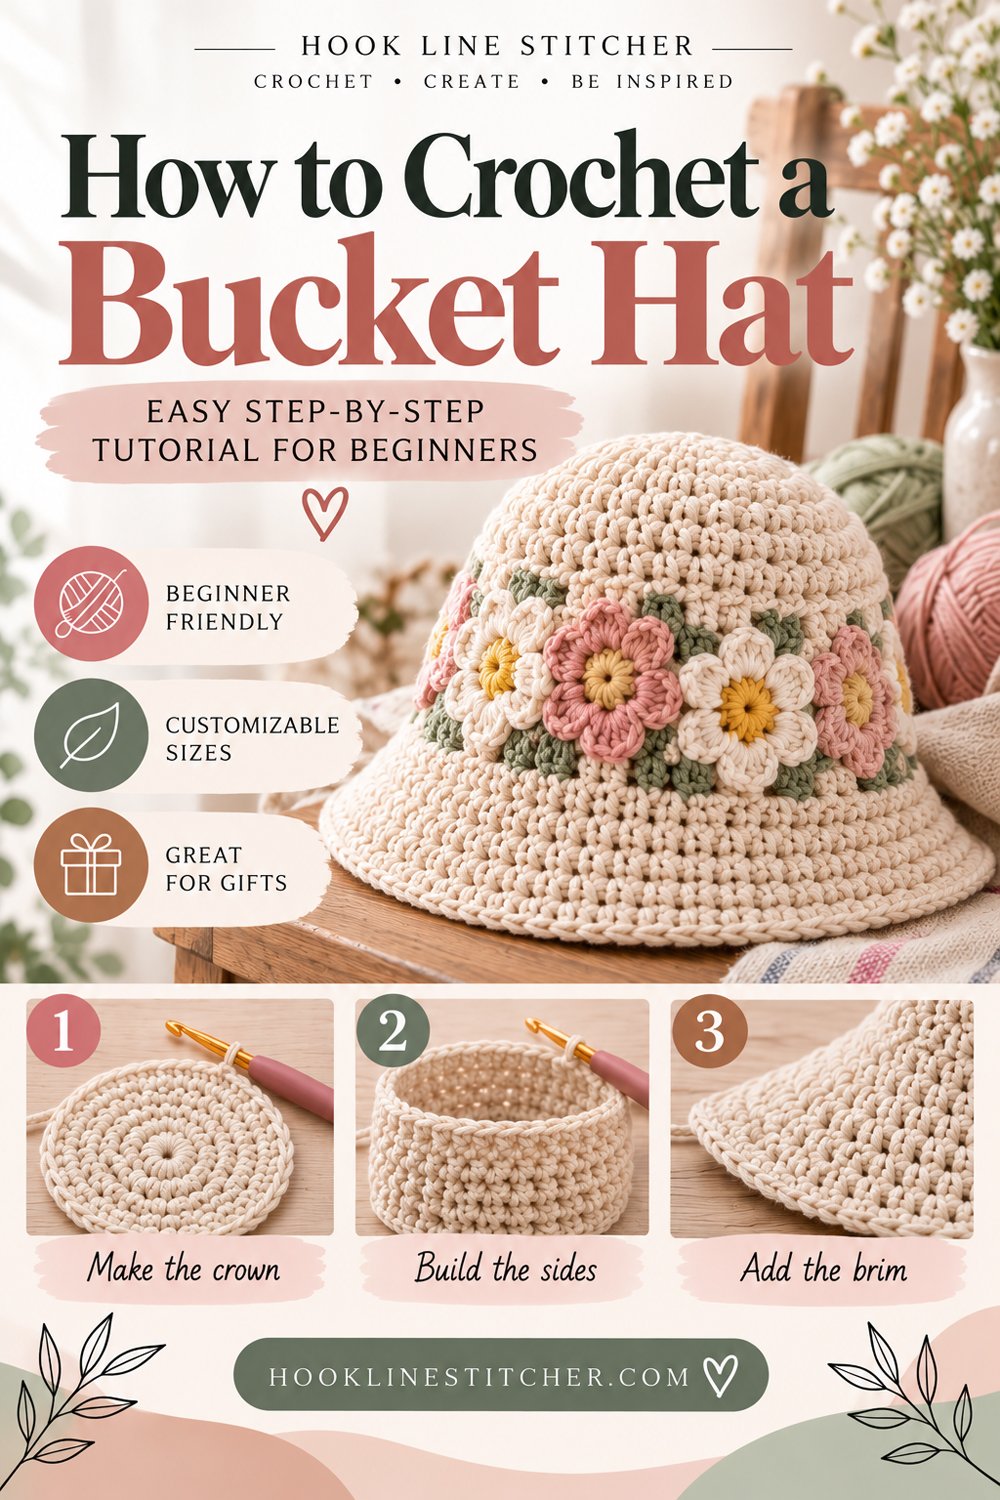
A bucket hat is the easiest hat there is, and it is also the one people actually wear. The construction is three stages that you can see and understand as you work: a flat circle for the crown, straight sides with no shaping at all, then a few increase rounds that flare out into the brim. There is no decreasing anywhere, and no sewing.
If you have made a hat before and it came out looking like a cone or a bowl, the problem was almost certainly the transition between those stages rather than the stitches themselves. This tutorial spends real time on the transitions, because that is where hats go wrong.
What you will need
| Item | What I recommend | Why |
|---|---|---|
| Yarn | Worsted weight (#4) cotton or cotton blend, 200 yards | Cotton holds the brim shape; acrylic goes floppy |
| Hook | 4.0 mm | Deliberately tight for a firm fabric |
| Stitch marker | Or scrap yarn | Marks the round |
| Yarn needle | Blunt tapestry needle | Weaving in ends |
| Measuring tape | Soft tape | Head measurement |
The yarn choice is genuinely important on this one. A bucket hat is defined by its stiff brim, and acrylic simply will not hold one — the brim droops within a day of wearing and the hat becomes a floppy bag. Cotton, or a cotton-acrylic blend, keeps its shape. It is the difference between a hat you wear and a hat you put in a drawer.
Cathrinee’s Supply Kit
Everything you need for this project
Stitches you need to know
- Magic ring — or chain 4 and join into a ring
- Single crochet (sc) — see how to crochet a single crochet stitch
- Increase (inc) — 2 sc into one stitch
- Slip stitch (sl st) — only at the very end
That is everything. No decreases, no post stitches, no colour work unless you want it.
Measure your head first
Wrap the tape around your head where the hat will sit — across the forehead, just above the ears. Most adults measure between 21 and 23 inches.
You will use this number twice: once to decide when to stop increasing on the crown, and once to check the fit before you start the brim. Do not skip it. A bucket hat that is too big slides down over your eyes and a bucket hat that is too small sits on top of your head like a bowl.
The three stages, and why the transitions matter
Stage one, the crown. You increase 6 stitches every round, which is exactly the rate that keeps a circle flat. Increase faster and it ruffles; slower and it cups. The full explanation is in why is my crochet circle not flat.
Stage two, the sides. You stop increasing completely. The moment you stop, the circle has nowhere to grow outward so it turns down and becomes a wall. This is the transition people get wrong — they taper off gradually, and you get a cone.
Stage three, the brim. You start increasing again, but more gently than on the crown, so the fabric flares outward without ruffling.
Stop increasing abruptly. Start increasing abruptly. Sharp transitions make a bucket hat; gradual ones make a sun hat that fits nobody.
How to crochet a bucket hat step by step
Stage one: the crown
- Magic ring, 6 sc. Pull it closed and place your marker in the first stitch. Move it every round.
- Round 2: Increase in every stitch. 12 stitches.
- Round 3: (sc 1, inc) around. 18 stitches.
- Round 4: (sc 2, inc) around. 24 stitches.
- Round 5: (sc 3, inc) around. 30 stitches.
- Round 6: (sc 4, inc) around. 36 stitches.
- Continue this pattern, adding one more plain stitch between increases each round, until your flat circle measures 6.5 to 7 inches across for an average adult. That usually lands around round 10 or 11, at 60 to 66 stitches. Measure rather than count — your tension decides this.
- Check it against your head. The circle should sit on the crown of your head and reach roughly to the top of your ears. If it is smaller, work one more increase round; if it already comes past your ears, you have gone too far and should pull back a round.
Stage two: the sides
- Round 11 onward: single crochet around with no increases at all. The fabric will immediately turn downward. This is correct and it is meant to feel sudden.
- Work 14 to 18 rounds straight. Fourteen gives a shallow hat, eighteen a deeper one that covers more of the head. Try it on as you go — you can pull the work straight onto your head.
- Stop when the sides reach the middle of your ears. That is where the brim should begin.
Stage three: the brim
- Brim round 1: (sc 5, inc) around.
- Brim round 2: Single crochet around, no increases.
- Brim round 3: (sc 6, inc) around.
- Brim round 4: Single crochet around.
- Brim round 5: (sc 7, inc) around.
- Brim round 6: Single crochet around. Then slip stitch into the next stitch and fasten off.
Notice the rhythm: increase round, plain round, increase round, plain round. The plain rounds between are what stop the brim ruffling into a frill.
- Weave in your ends on the inside and trim close.
- Shape the brim. Press it flat with your hands, or for cotton, dampen it lightly, flatten it on a towel and let it dry. It will hold.
Troubleshooting
My hat is a cone. You tapered off the increases gradually instead of stopping dead. Pull back to the flat circle and stop all increases in one round.
The crown ruffles and will not lie flat. Too many increases. Work a round with none and see if it settles.
The hat is too big. The crown circle was too wide before you started the sides. It needs to be 6.5 to 7 inches, not 8.
The hat is too small and sits on top of my head. The crown was too narrow. There is no fix except pulling back to the circle and adding an increase round.
The brim droops. Almost always acrylic yarn. Cotton holds a brim; acrylic does not. If you are stuck with acrylic, work the brim on a 3.5 mm hook to tighten it, or run a length of millinery wire around the outer edge and crochet over it.
The brim is ruffling like a lettuce leaf. You increased on consecutive rounds. Put a plain round between every increase round.
I keep losing my round. Move the marker into the first stitch of every new round without exception — spiral rounds have no join to count from. See how to count crochet stitches.
There are visible gaps. Hook too big for the yarn. A hat wants a firm fabric; go down half a size. See why are there holes or gaps in my crochet.
Variations to try
- Two-tone brim. Work the crown and sides in one colour and change for the brim.
- Wide-brim sun hat. Add two more increase-and-plain pairs to the brim for a much wider version.
- Reversible. Make two hats in different colours, one slightly smaller, and stitch them together around the brim edge.
- Textured crown. Work the side rounds in back loop only for horizontal ribbing.
- Matching set. Pair it with a tote bag in the same cotton for a summer set, or with a bandana.
- Child size. Stop the crown circle at 5 inches and work 12 side rounds.
Why this is the hat to make first
A beanie has to hug a head and depends entirely on getting the gauge right. A bucket hat sits on a head. If it comes out slightly large it looks intentionally slouchy; slightly small and it perches, which is also a look. That tolerance makes it far less frustrating than a fitted hat for a first attempt.
It is also worn in every season, which is more than you can say for most crochet wearables.
For more projects at this level, see crochet patterns for beginners, and if you want a fitted hat next, how to crochet a hat uses the same crown method with a different ending.
To check your yarn against the right hook, use the Craft Yarn Council hook size chart.
What yarn is best for a crochet bucket hat?
Cotton or a cotton-acrylic blend. A bucket hat is defined by its stiff brim, and pure acrylic will not hold one — the brim droops within a day of wearing. Cotton keeps its shape and can be dampened and flattened to set it.
How big should the crown circle be before I start the sides?
Six and a half to seven inches across for an average adult, which usually lands around 60 to 66 stitches. Measure rather than counting rounds, because your own tension decides how many rounds that takes. Place it on your head — it should reach roughly to the top of your ears.
Why did my crochet hat come out like a cone?
You reduced the increases gradually instead of stopping them all at once. When the crown circle reaches the right width, work the very next round with no increases at all. The sharp transition is what turns the circle down into a wall.
How do I stop the brim ruffling?
Alternate increase rounds with plain rounds — increase, plain, increase, plain. Increasing on consecutive rounds adds fabric faster than the brim can absorb and it frills. Six brim rounds with three increases among them is the right balance.
How many rounds should the sides of a bucket hat be?
Fourteen to eighteen rounds for an adult. Fourteen gives a shallow hat and eighteen a deeper one. Try it on as you work and start the brim when the sides reach the middle of your ears.





3 Comments on “How to Crochet a Bucket Hat: Easy Step-by-Step Tutorial for Beginners”