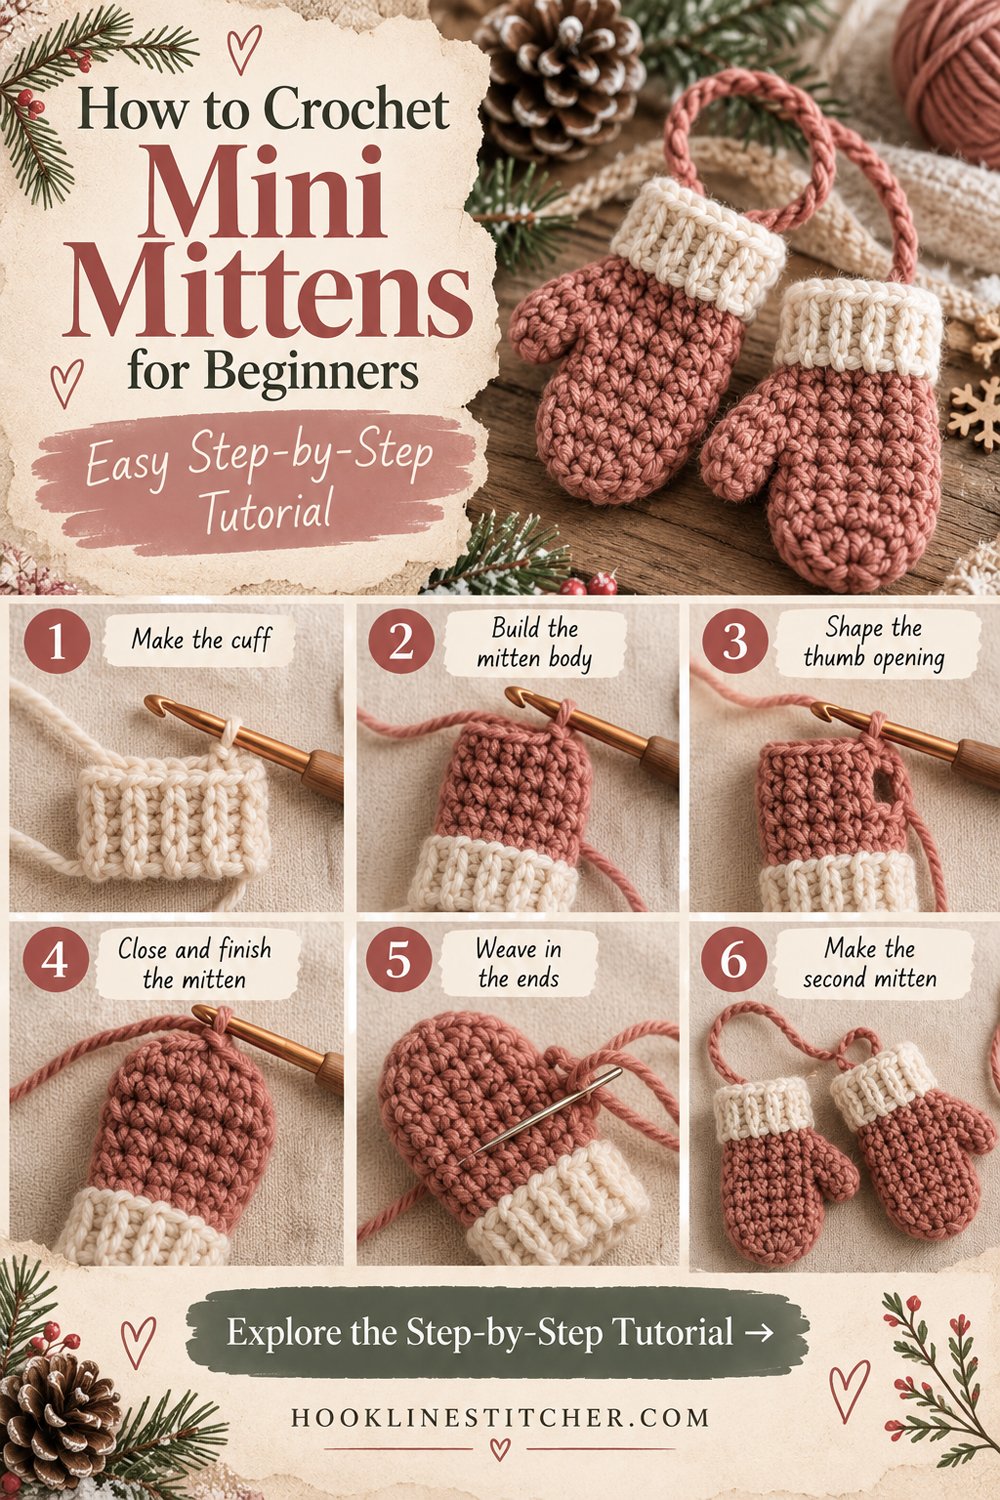
Mini mittens are the Christmas ornament that costs almost nothing and looks like you tried very hard. A pair joined by a length of chain, hung over a branch or a mantelpiece, is one of those decorations people actually comment on.
They are also genuinely easy. These are flat mittens, not wearable ones — which removes the only hard part of a real mitten, the thumb gusset. You make two flat mitten shapes, join them around the edge, and that is it. No fit, no shaping, no gauge to match.
Each mitten takes about twenty minutes.
What you will need
| Item | What I recommend | Why |
|---|---|---|
| Yarn | Worsted weight (#4) in red or green, 30 yards | The mittens |
| Yarn | White or cream, 15 yards | The cuffs |
| Hook | 4.0 mm | Firm fabric that holds a flat shape |
| Yarn needle | Blunt tapestry needle | Joining and weaving in |
| Stuffing | A tiny pinch, optional | For a padded version |
Cotton gives the crispest shape and blocks beautifully flat, which matters for something that hangs. Acrylic is softer and works fine — just press the finished pair under a book.
Cathrinee’s Supply Kit
Everything you need for this project
Stitches you need to know
- Chain (ch) — see how to crochet a chain stitch
- Single crochet (sc) — see how to crochet a single crochet stitch
- Increase (inc) — 2 sc into one stitch
- Decrease (dec) — single crochet two together
- Slip stitch (sl st)
Five stitches, all of them basic. No post stitches, no thumb gusset, no colour work beyond a simple change at the cuff.
How to crochet mini mittens step by step
You need four flat pieces in total — two for each mitten, front and back.
The mitten body (make 4)
- Chain 9.
- Row 1: Single crochet into the second chain from the hook and into each chain across. 8 stitches. Chain 1, turn.
- Rows 2 to 5: Single crochet across. 8 stitches each row. Chain 1, turn.
- Row 6 — shape the top: sc 1, dec, sc 2, dec, sc 1. 6 stitches. Chain 1, turn.
- Row 7: sc 1, dec, dec, sc 1. 4 stitches. Chain 1, turn.
- Row 8: dec, dec. 2 stitches. Fasten off leaving a tail.
You now have a shape that is straight for most of its length and tapers to a rounded top — the mitten hand.
The thumb (make 4)
- Chain 5.
- Row 1: Single crochet into the second chain from the hook and across. 4 stitches. Chain 1, turn.
- Row 2: Single crochet across. 4 stitches. Chain 1, turn.
- Row 3: dec, dec. 2 stitches. Fasten off leaving a tail.
A small tapered tab. Make four — two per mitten.
Assembly
- Sew a thumb to each mitten piece, positioned on the side about a third of the way up from the bottom edge, angled slightly outward. On two of the pieces put the thumb on the left, and on the other two put it on the right — otherwise you end up with two left mittens.
- Hold two pieces together, wrong sides facing, with the thumbs lining up.
- Join them. Work single crochet around the entire outer edge through both layers, including around the thumb. Go slowly around the curves and the thumb notch — these are the fiddly bits. Leave the bottom edge open.
- Optional padding: before you close the last side, push a tiny pinch of fibrefill inside. A slightly padded mitten hangs better and looks plumper. Do not overstuff — it should still be nearly flat.
The cuff
- Change to white yarn and work into the open bottom edge.
- Round 1: Single crochet evenly all the way around the opening, through both layers. Join with a slip stitch.
- Rounds 2 and 3: Single crochet around in the back loop only. This creates a small ribbed cuff that looks like real knitted ribbing.
- Fasten off and weave in the ends.
- Repeat everything for the second mitten, remembering the thumb goes on the opposite side.
The string
- Chain 40 in white or red.
- Slip stitch back along every chain to firm it up. A plain chain twists into a spiral; working back down it makes a flat, stable cord.
- Sew one end to the cuff of each mitten. Fasten off and weave in.
- Block them. Dampen both mittens, pin them flat into shape and let them dry. If you used cotton they will hold it like card. For acrylic, press under a heavy book for an hour.
Troubleshooting
I made two left mittens. The classic mistake. The thumb must go on the left for two of the four pieces and on the right for the other two. Lay all four out and check before you sew anything.
The edges look lumpy where I joined them. Your single crochet around the edge is going too deep or skipping stitches. Catch one strand from each layer, evenly spaced, and slow right down around the curves.
The mitten curls. Single crochet always curls in small flat pieces. Block it, or press it under a book. This is not optional for an ornament that hangs.
My rows are getting wider or narrower. You are gaining or losing stitches at the row ends. Count after every row. Why are my crochet rows getting wider or narrower shows exactly where it happens.
The thumb looks wrong. It is probably too high or too straight. Move it down so the base sits about a third of the way up, and angle it outward rather than straight up.
The cuff flares out. Work it in back loop only and keep the stitch count the same as the opening. If it still flares, go down a hook size for the cuff rounds.
The hanging string twists. You chained it but did not work back along it. Slip stitch into every chain on the way back.
Variations to try
- Fair isle look. Work two rows in a contrasting colour across the middle of each mitten before joining.
- Garland. Make five or six pairs and string them along a long chain across a mantelpiece.
- Advent pockets. Make the mittens slightly larger, leave the cuff open, and tuck a small treat inside each one.
- Matching hat ornament. A tiny cone with a cuff and a pompom, hung alongside.
- Place settings. A single mini mitten with a name tag tucked in the cuff makes a lovely Christmas table setting.
- Gift tags. Attach one to a parcel. Nobody throws away a crochet mitten.
Why these make such good first ornaments
A mini mitten teaches three things at once — working flat rows, simple decreasing, and joining two pieces with a crochet seam — on a project small enough that a mistake costs you ten minutes rather than an evening.
They also use roughly 10 yards of yarn per mitten, so a pair costs almost nothing and a whole garland comes out of a single skein. Store them flat in an envelope and they come out perfect every December.
For more festive projects, see easy Christmas crochet patterns for beginners and how to crochet Christmas ornaments. For more quick makes, small crochet patterns for beginners.
To match your yarn to the right hook, the Craft Yarn Council hook size chart is the reference to use.
How do you crochet a mini mitten?
Make two flat mitten shapes and a small thumb tab for each one, sew the thumbs on, then single crochet around the outer edge through both layers to join them. Finish with a few rounds of cuff worked in back loop only. There is no thumb gusset because these are ornaments, not wearable mittens.
How do I avoid making two left mittens?
Make four body pieces, then sew the thumb onto the left side of two of them and the right side of the other two. Lay all four out and check the thumb positions before you join anything — this is the single most common mistake with mittens.
Why do my crochet mini mittens curl?
Single crochet curls naturally in small flat pieces. Block them — dampen, pin flat into shape and let dry. Cotton will hold the shape permanently; acrylic can be pressed under a heavy book for an hour. For an ornament that hangs, blocking is not optional.
How do I make the mitten cuff look ribbed?
Work the cuff rounds into the back loop only. That leaves the front loop exposed as a small horizontal ridge, which reads as knitted ribbing. Keep the stitch count the same as the opening so the cuff does not flare.
How much yarn do mini mittens use?
About 10 yards per mitten, so a pair costs almost nothing and a whole garland comes out of one skein. They store flat in an envelope between seasons, which makes them ideal for batch-making as gifts.