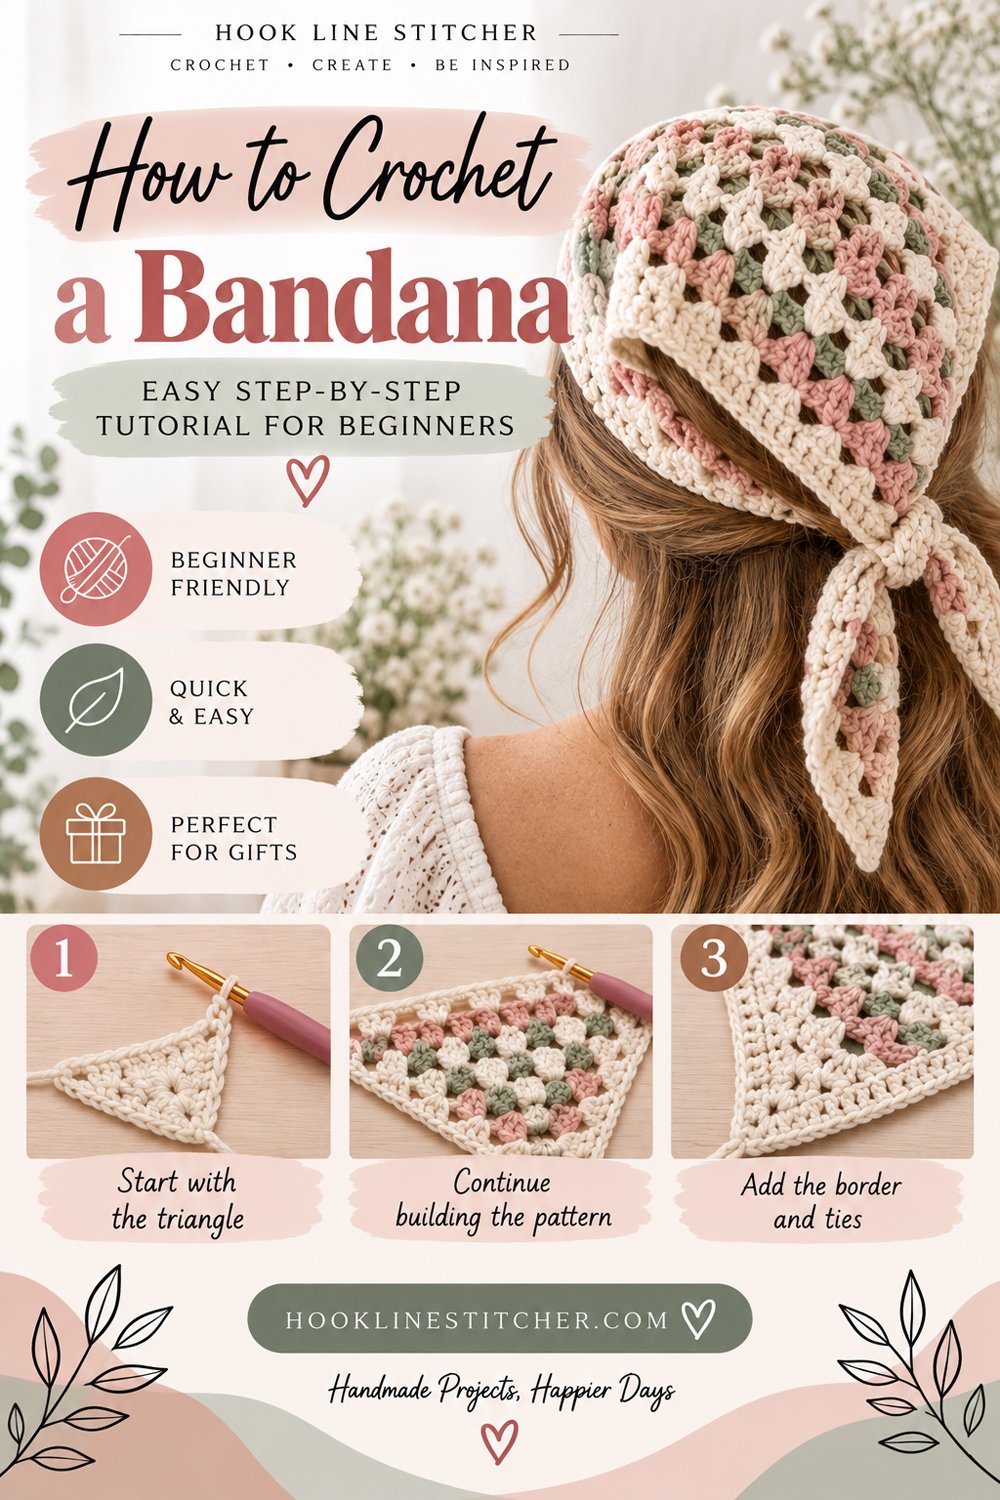
A crochet bandana is a triangle with two strings on it. That is honestly the whole design, and it is why this is such a good early project — there is no fit to worry about, no sizing, no shaping beyond growing wider by two stitches every row.
It is also a genuinely useful thing to own. It works as a head scarf, a hair wrap, a neckerchief, and folded over a bun. And because it takes one ball of yarn and about two hours, it is a realistic same-day make.
What you will need
| Item | What I recommend | Why |
|---|---|---|
| Yarn | DK (#3) or worsted weight (#4) cotton, about 150 yards | Cotton drapes and does not stretch out of shape |
| Hook | 4.0 mm | Gives a fabric with a bit of openness |
| Yarn needle | Blunt tapestry needle | Weaving in ends |
| Measuring tape | Soft tape | Checking the width |
Cotton is the right call here. A bandana sits against your head or neck all day, and acrylic gets warm and clingy against skin. Cotton also keeps the triangle from stretching downward under its own weight, which acrylic will do over a few wears.
Cathrinee’s Supply Kit
Everything you need for this project
Stitches you need to know
- Chain (ch) — see how to crochet a chain stitch
- Double crochet (dc) — the body of the bandana, see how to crochet a double crochet stitch
- Single crochet (sc) — the edging
- Slip stitch (sl st) — finishing the ties
How a triangle grows
The bandana starts at the point and grows upward. Every row you add two double crochet at the start and two at the end, so the row is four stitches wider than the one before. Stack enough of those and you get a symmetrical triangle.
This is the reverse of how most people imagine a triangle being made. You are not decreasing down to a point — you are starting at the point and opening outward. It means the rows get longer as you go, so the project feels slow at first and then speeds up in perceived progress even as each row takes longer. That is normal.
How to crochet a bandana step by step
The triangle
- Chain 4. This tiny chain is the very tip of the bandana.
- Row 1: Work 2 dc into the fourth chain from the hook. Chain 2, then work 2 more dc into that same chain. You now have a small wedge with a chain-2 space in the middle. That centre space is the spine of the triangle and every row will have one.
- Row 2: Chain 3 and turn. Work 2 dc into the first stitch. Double crochet across to the centre chain-2 space. Into that space work (2 dc, ch 2, 2 dc). Double crochet across to the end. Work 2 dc into the last stitch.
- Rows 3 onward: Repeat row 2 every single time. Chain 3, turn, 2 dc in the first stitch, dc across to the centre space, (2 dc, ch 2, 2 dc) into the space, dc across, 2 dc in the last stitch.
- Keep going until it is wide enough. Measure across the top edge as you work. For a head scarf tied at the back, 22 to 26 inches across is right for an adult. For a neckerchief, 18 to 20 inches. For a hair wrap over a bun, 16 inches is plenty. This usually takes 15 to 22 rows depending on your tension.
- Do not fasten off. You go straight into the edging.
The edging
- Work single crochet along the two angled sides. Starting at one top corner, single crochet evenly down the slope to the bottom point, work 3 sc into the point itself so it stays sharp, then single crochet up the other slope. This edging firms up the diagonal edges, which would otherwise be loose and stepped.
- Do not edge the top. The top edge is where the ties attach and it is fine as it is.
The ties
- At the top corner where your edging ended, chain 60. Work a slip stitch back into each chain all the way down to make the tie firm and less prone to stretching or curling. Slip stitch into the corner to secure. Fasten off.
- Join yarn at the other top corner and make an identical tie: chain 60, slip stitch back down, secure, fasten off.
- Weave in every end along the wrong side, changing direction once. Trim close.
- Block it if you used cotton. Dampen the bandana, pin it flat into a triangle on a towel, and let it dry. It sharpens the point and flattens the edges beautifully. Acrylic can be pressed under a book instead.
Troubleshooting
My triangle is lopsided. One side is getting more stitches than the other. Count each half separately — from the edge to the centre chain-2 space — after every few rows. They should always match.
The centre spine is drifting sideways. You worked into the stitches beside the chain-2 space instead of into the space itself. The (2 dc, ch 2, 2 dc) all goes into the space.
The top edge is much longer than I wanted. Triangles grow fast — each row adds 4 stitches, which is about an inch of width. Measure every third row rather than every tenth.
The sides are loose and stepped. That is exactly what the single crochet edging fixes. Do not skip it.
The ties curl up into spirals. You chained but did not slip stitch back along the chain. A plain chain always curls; working back along it straightens it.
My rows are getting narrower rather than wider. You are missing the 2 dc at the row ends. Full explanation in why are my crochet rows getting wider or narrower.
The bandana is heavy and droops. Too large, or acrylic yarn. Cotton at the sizes above sits properly.
Variations to try
- Granny stitch bandana. Instead of solid double crochet, work clusters of 3 dc with a chain 1 between them for a lacy, faster version. The same increase logic applies.
- Striped. Change colour every four rows. Because the triangle grows, the stripes get wider as they go, which looks intentional and lovely.
- Picot edge. Work (sc, ch 3, sl st into the same stitch) along the slopes instead of plain single crochet.
- Tassel at the point. Cut eight 6-inch lengths of yarn, fold them in half, and pull the loop through the bottom point. Knot and trim level.
- Pet bandana. Make it 12 inches across with shorter ties. Extremely popular as a handmade gift.
- Matching set. Pair it with a bucket hat or a tote bag in the same cotton.
Sizing at a glance
| Use | Top edge width | Approximate rows |
|---|---|---|
| Hair wrap over a bun | 16 inches | 12 to 14 |
| Neckerchief | 18 to 20 inches | 14 to 17 |
| Head scarf tied at the back | 22 to 26 inches | 18 to 22 |
| Pet bandana | 12 inches | 9 to 11 |
Treat the row counts as a guide only and trust the measurement — everyone’s tension produces a different row height, which is exactly why crochet gauge matters more than row numbers on anything that has to fit.
For more projects at this level, see crochet patterns for beginners and easy crochet gifts for beginners.
To check your yarn weight against a hook size, use the Craft Yarn Council yarn weight system.
How do you crochet a triangle for a bandana?
Start at the point and grow outward. Chain 4, then work rows that add 2 double crochet at the start, 2 at the end, and (2 dc, chain 2, 2 dc) into a centre chain-2 space. Each row comes out 4 stitches wider than the last, which builds a symmetrical triangle.
How big should a crochet bandana be?
Measure across the top edge. A head scarf tied at the back needs 22 to 26 inches for an adult, a neckerchief 18 to 20 inches, a hair wrap over a bun about 16 inches, and a pet bandana around 12 inches.
What yarn should I use for a crochet bandana?
Cotton or a cotton blend in DK or worsted weight. A bandana sits against skin all day, and acrylic gets warm and clingy. Cotton also stops the triangle stretching downward under its own weight, which acrylic does after a few wears.
Why are my bandana ties curling into spirals?
You chained the ties but did not work back along them. A plain chain always twists. Chain 60, then slip stitch into each chain all the way back to the corner — that second pass straightens the tie and stops it stretching.
Why is my crochet bandana lopsided?
One half is gaining more stitches than the other. Count from the edge to the centre chain-2 space on each side after every few rows — the two halves should always match. Also check that the (2 dc, chain 2, 2 dc) is going into the chain space itself, not the stitches beside it.




