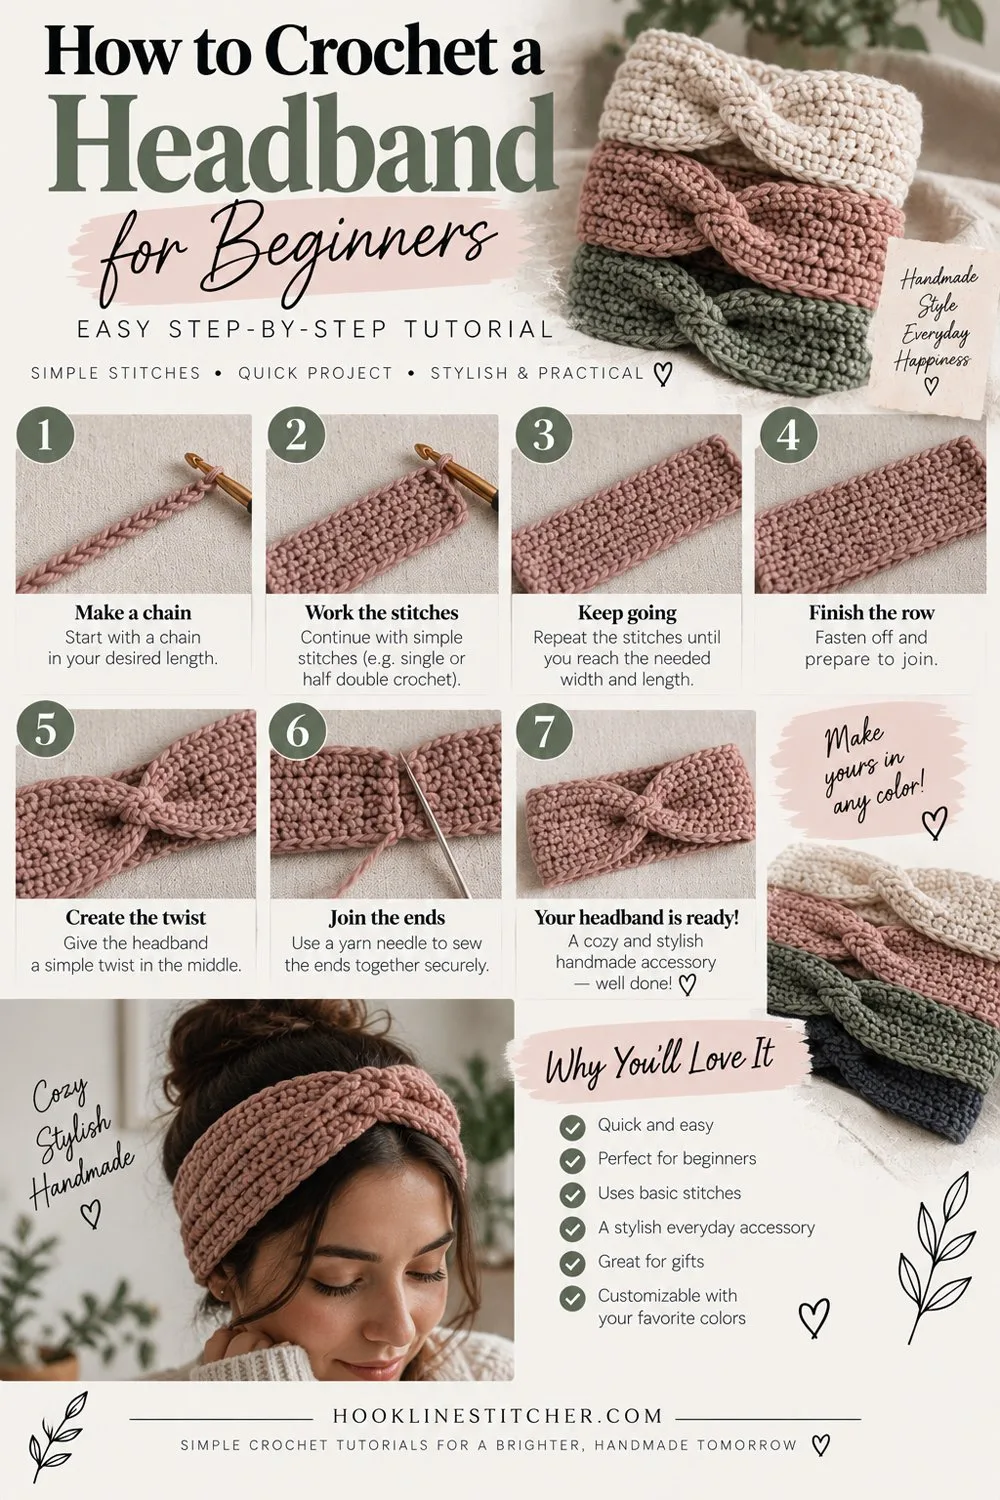
This headband is a rectangle with its ends sewn together, and it looks nothing like one. Here is how to crochet a headband from a single strip of ribbing, with one short seam at the end.
- Skill level: Beginner
- Time: About 1 hour
- Yarn: Worsted (4) acrylic or wool blend (about 40 m)
- Hook: 5.0mm
- Finished size: Made 5 cm shorter than the head measurement
- Terms: US crochet terms
The trick is a single technique: working every stitch into the back loop only. That one change turns flat single crochet into ribbing — a stretchy fabric with vertical ridges that looks knitted rather than crocheted. It is the same effect used on jumper cuffs and hat brims, and it is the reason this headband stretches to fit instead of sitting stiffly on your head.
You work the rectangle sideways, so the ribs run around the head rather than along it. That is what makes it stretch in the direction it needs to.
About an hour, and it is a genuinely wearable thing at the end.
What you need to know first
- Chain stitch
- Single crochet
- Working into the back loop only — this is the whole technique, and if it is new, it is one sentence: instead of putting your hook under both loops of the V at the top of a stitch, put it under the back one only
That is the full skill list.
What you need
Worsted weight (4) yarn. Acrylic or a wool blend is ideal here — soft against the forehead, warm, and with a bit of give. This is the one project on the site where cotton is the worse choice: cotton has almost no natural stretch, and a headband needs some.
A 5.0mm hook.
A tapestry needle and scissors.
About 40 metres, so half a ball.
Measure the head before you start, or use these: child 46–50 cm, teen 52–54 cm, adult 55–58 cm. You will crochet slightly shorter than this on purpose — explained below.
Cathrinee’s Supply Kit
Everything you need for this project
Terms
US crochet terms.
- ch = chain
- sc = single crochet (UK double crochet)
- BLO = back loop only
- st(s) = stitch(es)
How to crochet a headband, row by row
The strip is worked sideways. The width of the strip becomes the width of the headband, and the length goes around the head.
Ch 11.
Row 1: sc in the 2nd ch from hook and in each ch across — (10)
Row 2: ch 1, turn, sc BLO in each st across — (10)
Repeat row 2 until the strip measures about 5 cm shorter than the head measurement, gently stretched.
For an adult that is usually around 50 cm of strip for a 55 cm head — roughly 100 to 110 rows depending on your tension.
Why shorter? Ribbed fabric stretches, and a headband that fits exactly when relaxed will slide off within an hour. Making it 5 cm short means it sits under slight tension and stays put. This is the detail that separates a headband you wear from one that lives in a drawer.
Check the fit as you go. Every twenty rows or so, wrap the strip around the head and see where you are. Much easier than unpicking.
Fasten off, leaving a 40 cm tail for seaming.
Joining the ends
Bring the two short ends together, right sides facing each other, and line up the stitches.
Thread the tail on your tapestry needle and whip stitch through both layers — pass the needle through one stitch on each side, pull snug, move along, repeat. Work across all ten stitches, then go back the other way through the same stitches for strength. A headband seam gets pulled every time it goes on.
Turn it right side out. The seam should be nearly invisible against the ribbing.
The twist-front variation
The version that looks considerably more designed, for about two extra minutes of work.
Before you seam the ends together, give one end a half twist so the strip has a single turn in it. Then join as normal, and rotate the headband so the twist sits at the centre front.
It is a Möbius strip, and it reads as a deliberate design feature rather than a plain band. Most shop-bought crochet headbands use exactly this.
Alternative front detail: seam the ends flat as normal, then cut a 30 cm length of yarn and wrap it tightly around the middle of the band eight or ten times, cinching it in. Tie off at the back and weave in the ends. This gives a gathered knot front.
Troubleshooting
It is too loose and slides off. The most common problem. Ribbing stretches more than people expect. Unpick the seam, remove five or six rows, and rejoin.
It is too tight and gives me a headache. Add rows. A headband should sit under light tension, not grip.
It does not look ribbed. You are working into both loops instead of the back loop only. Check the top of your stitches — you should be going under a single strand, and the front loops should be visible as horizontal ridges on the surface.
The edges are uneven. Count every row. Ten stitches, always. The ch-1 at the start is not a stitch and should never be worked into.
It is curling. Ribbing curls slightly by nature and it settles once seamed. If it is severe, tension is too tight — go up a hook size.
The seam is visible. Line the stitches up carefully before sewing, and match the seam to the ribs rather than the rows. Or make it the back and forget about it.
Variations
Ear warmer. Work the initial chain longer — ch 16 instead of ch 11 — for an 8 cm wide band that covers the ears properly. Same construction.
Two-tone twist. Work half the strip in one colour and half in another, then twist and join. The twist makes the colour change look intentional.
With a bow. Make a small separate rectangle, pinch it in the middle, and wrap it around the seam.
With a flower. Sew a crochet flower over the seam. Covers any untidiness and turns it into a different accessory.
Child size. Ch 9 instead of 11 for a narrower band, and measure to a child head.
Chunkier. Chunky yarn with a 6.5mm hook makes a thicker, warmer winter version. Ch 8 rather than 11 — chunky stitches are taller, so fewer give the same width.
Why this is a good first wearable
Most first wearables go wrong because of sizing, and most beginner patterns handle sizing badly. A headband has exactly one measurement, you can check it against a head at any point, and if it is wrong you unpick one seam rather than the whole project.
It also introduces back loop ribbing, which shows up in hat brims, cuffs, and jumper edges. Learn it here on something that takes an hour.
What is next
The same ribbing technique makes a hat brim — work a strip, seam it into a loop, then work rounds up from the edge. That is most of a beginner beanie.
For something shorter, a crochet scrunchie is a twenty-minute project in the same accessory category.
Frequently asked questions
How long should a crochet headband be? About 5 cm shorter than the head measurement. Ribbed fabric stretches, and a band made to exact size will slip off.
What is the best yarn for a crochet headband? Worsted weight acrylic or a wool blend — soft and slightly stretchy. Cotton is a poor choice here because it has almost no give.
Why does my headband not look ribbed? You are working into both loops. Back loop only means inserting the hook under the single back strand of the V, not both.
How do I make a crochet headband stretchy? Back loop only single crochet, worked sideways so the ribs run around the head. That combination is what produces the stretch.
Can I make this without sewing? Not really — the ends need joining. But it is a single short seam across ten stitches, which is about as little sewing as a wearable can involve.
How much yarn does a crochet headband use? Around 40 metres of worsted weight, so roughly half a standard ball.
Will it stretch out over time? Acrylic holds its shape well. A wool blend will relax slightly with wear, so err on the shorter side if you are using one.
You are welcome to sell items you make from this pattern. Please do not republish the pattern text — link to this page instead. Pattern © The Hook Line Stitcher.
How do you crochet a headband?
Chain to your head measurement minus an inch, then work rows of half double crochet in back loop only to create stretchy ribbing. Join the two ends with a slip stitch seam and weave in the ends.
How do I size a crochet headband?
Measure around your head where the band will sit and subtract about an inch. Ribbed crochet stretches with wear, so a band made to the exact measurement will loosen and slide within an hour.
What yarn should I use for a headband?
Soft worsted weight acrylic or an acrylic-wool blend. It sits against your forehead all day, so avoid anything scratchy. Pure wool is warm but some people find it irritating against skin.
How long does a crochet headband take?
About an hour to ninety minutes for a first one, and under an hour once you know it. It uses roughly 60 yards, so well under half a skein.
Can I add a twist or bow to a headband?
Yes. Pinch the band at the seam, wrap a separate length of yarn tightly around the gather eight to ten times, and tie off behind. That twisted centre is what makes a plain band look designed.





7 Comments on “How to Crochet a Headband for Beginners: Easy Step-by-Step Tutorial”