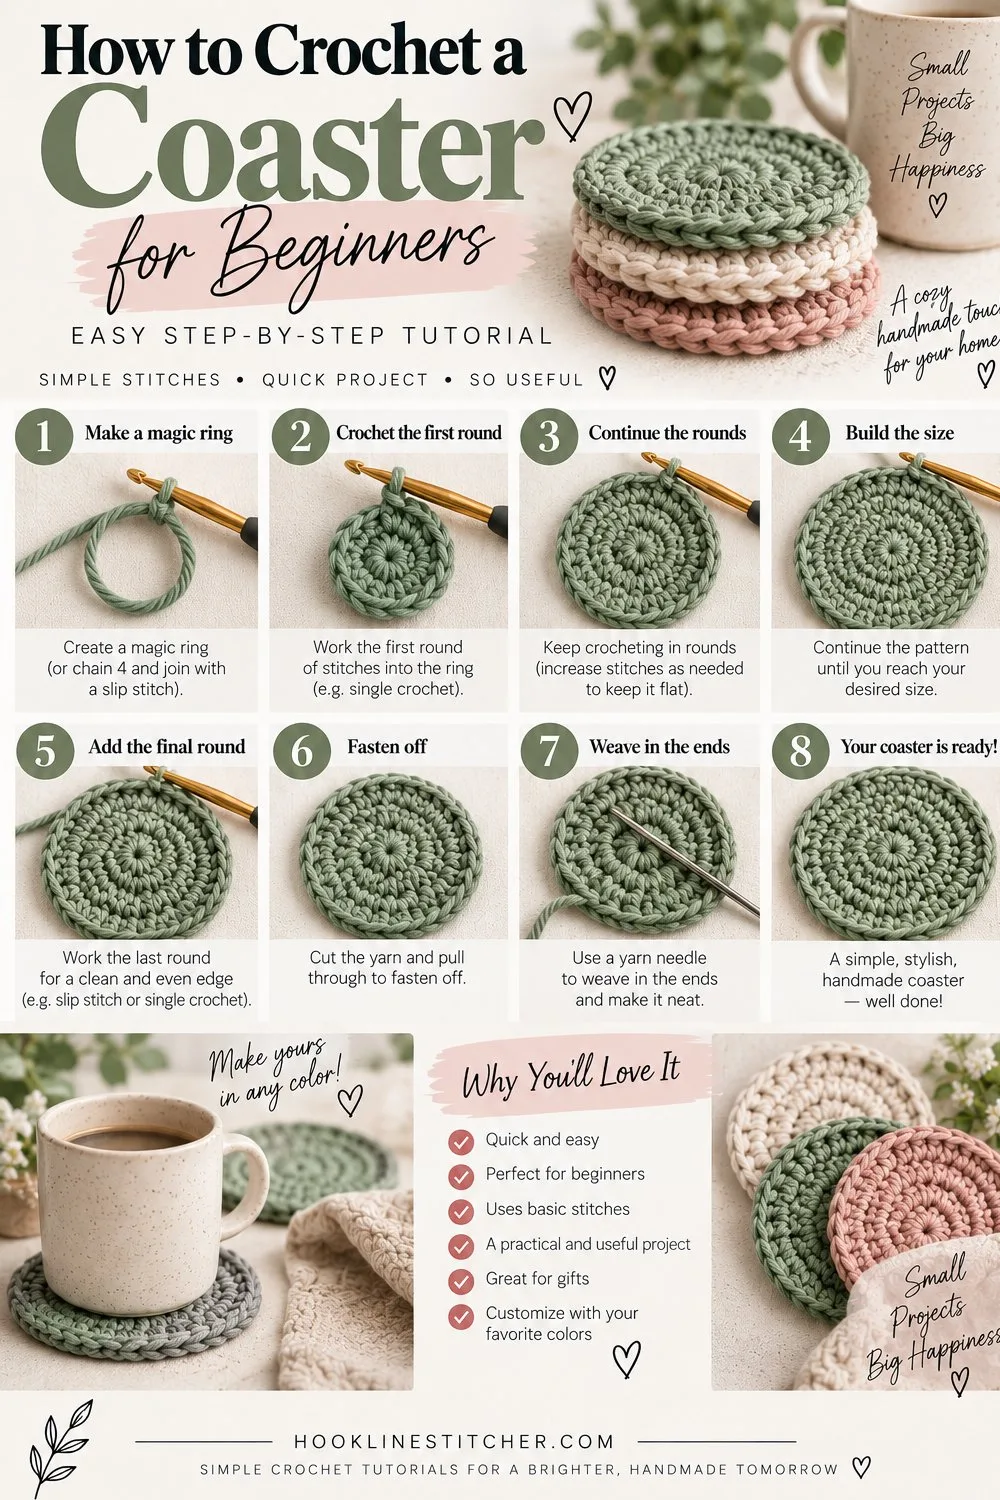
A crochet coaster takes fifteen minutes, and it teaches you the single most useful thing in crochet: how to make a circle lie flat. Below is how to crochet a coaster from the first round to the edging, plus the circle rule that makes it lie flat.
- Skill level: Beginner
- Time: About 15 minutes
- Yarn: Worsted weight 100% cotton
- Hook: 4.0mm or 4.5mm
- Finished size: About 10 cm across
- Terms: US crochet terms
That sounds like a small thing. It isn’t. Flat circles are the foundation of hats, bags, baskets, mandalas, rugs, doilies, and half of amigurumi. The rule that governs them is simple enough to learn in one project — and a coaster is the ideal project to learn it on, because it’s small, it’s finished in a sitting, and if it goes wrong you’ve lost a quarter of an hour.
Pattern below, plus the circle rule explained properly, because understanding it is worth more than the coaster.

From the shop · New pattern
A sweet cat-ear coaster in just 5 rounds. Beginner friendly, printable 7-page PDF for $4.99.
See the pattern →What you need to know first
- double crochet
- single crochet, for the edging
- The magic ring
- Joining rounds with a slip stitch
No turning, no rows, no shaping beyond a repeating increase.
What you need
This post contains affiliate links. As an Amazon Associate I earn from qualifying purchases, at no extra cost to you. Full disclosure.
100% cotton yarn, worsted weight. This one genuinely matters. Cotton absorbs condensation, handles heat, and washes repeatedly without complaint.
Acrylic is the wrong choice for coasters specifically. Acrylic is a plastic, and it softens and deforms under a hot mug — leave a fresh cup of tea on an acrylic coaster and you can end up with a flattened, slightly shiny patch. It’s the one project where the yarn choice isn’t about preference.
A 4.0mm or 4.5mm hook. Slightly smaller than worsted cotton normally calls for, so the fabric is dense enough to protect the table.
A tapestry needle and scissors.
One 50g ball of cotton makes roughly six coasters, which is a set with a spare.
From the shop · New pattern
A sweet cat-ear coaster in just 5 rounds. Beginner friendly, printable 7-page PDF for $4.99.
See the pattern →Cathrinee’s Supply Kit
Everything you need for this project
A note on terms
This pattern uses US crochet terms.
- ch = chain
- sc = single crochet (UK double crochet)
- dc = double crochet (UK treble)
- sl st = slip stitch
- st(s) = stitch(es)
The circle rule
Before the pattern, this — because it explains every line of it.
To make a flat circle, every round must add the same number of stitches as the first round contains.
Round 1 has 12 double crochets. So round 2 adds 12, round 3 adds 12, round 4 adds 12. Always 12.
That produces the sequence 12 → 24 → 36 → 48, and the maths behind it is just geometry: a circle’s circumference grows at a constant rate as the radius grows, so the stitches must too.
Add more than that and the fabric ruffles. Too much circumference for the radius, so the edge waves.
Add less and it cups. Not enough circumference, so the edges pull upward — which is exactly how you deliberately make a hat or a bag, and exactly what you don’t want in a coaster.
The number changes with stitch height. Twelve for double crochet, six for single crochet — taller stitches make a bigger circle per round, so they need more increases. If you ever work a circle pattern in a different stitch and it misbehaves, this is the reason.
How to crochet a coaster, round by round
Finished coaster about 10 cm across.
Round 1: Make a magic ring. Ch 3 (counts as your first dc), then 11 dc into the ring. Join with a sl st to the top of the ch-3. Pull the ring closed firmly. (12 sts)
Round 2: Ch 3, 1 dc into the same stitch. Then 2 dc into every stitch around. Join to the top of the ch-3. (24 sts)
Round 3: Ch 3, 1 dc into the same stitch, 1 dc into the next stitch. Then 2 dc into the next stitch, 1 dc into the following stitch — repeat around. Join. (36 sts)
Stop here for a standard coaster.
Round 4 (optional, for a larger coaster or a mug rug): Ch 3, 1 dc into the same stitch, 1 dc into each of the next 2 stitches. Then 2 dc into the next stitch, 1 dc into each of the next 2 stitches — repeat around. Join. (48 sts)
The edging
An edging round tidies the outer edge, which is otherwise a bit ragged, and it firms up the shape.
Ch 1, then 1 sc into each stitch around. Join with a sl st to the first sc.
Fasten off, leaving a 15 cm tail. Weave it in through the back of the stitches in one direction, then turn and come back the other way.
Scalloped edging instead, if you want something prettier: skip 1 st, work 5 dc into the next st, skip 1 st, sl st into the next st, repeat around. Needs your final round to be a multiple of 4.
Stagger your increases
Small thing, big visual difference.
If you put every increase in the same position round after round, they stack into six straight lines radiating from the centre — and your circle comes out as a visible hexagon rather than a circle.
Notice that the pattern above starts round 3 with an increase, then one plain stitch. Round 4 starts with an increase, then two plain. That shift moves the increase positions round by round so they never stack.
If you’re ever improvising a circle and it starts looking angular, this is the cause. Move where the increases fall.
Blocking
Worth two minutes and it’s the difference between a handmade coaster and a nice handmade coaster.
Dampen the finished coaster, lay it flat, gently stretch it into a proper circle, and pin it or weight it down until dry. Cotton holds the shape it dries in.
Coasters in particular benefit, because any slight cupping or waviness flattens out permanently.
Troubleshooting
My coaster is ruffling at the edges. Too many increases. Count round 3 — it should be exactly 36 stitches. An extra increase per round compounds fast.
My coaster is cupping like a bowl. Too few increases, or tension too tight. Check your counts first. If the counts are right, block it flat and it’ll usually settle.
It’s coming out as a hexagon. Your increases are stacking. See the section above — shift the starting position each round.
There’s a hole in the middle. The magic ring wasn’t pulled fully closed. Pull harder, or close it from the back with the tail and a tapestry needle.
The join between rounds is visible as a seam. Normal for joined rounds. It’s the trade-off for being able to count easily. Position it at the back, or look into the invisible join technique once you’re comfortable.
My coaster isn’t flat but the counts are right. Uneven tension between rounds. Blocking fixes most of it.
It’s too floppy to be useful. Hook too large. Go down a size — coasters want dense fabric.
Variations
Single crochet version. Denser, thicker, more absorbent, better protection for the table. Work the same structure with 6 stitches in round 1 and 6 added per round: 6 → 12 → 18 → 24 → 30 → 36. Takes longer but makes a sturdier coaster.
Square coaster. A single granny square, three or four rounds, makes an excellent coaster and a set looks deliberately vintage.
Colour changes. Change colour at the start of each round for a concentric ring effect. Fasten off and rejoin, or carry the yarn up the inside.
Textured. Work round 3 in back loops only for a raised ridge around the edge.
Mug rug. Work round 4 and round 5 for something large enough to hold a mug and a biscuit. Add 12 stitches in round 5 for 60 total.
A set with a holder. Make six coasters plus a small cylinder — a flat circle base with sides worked in back loops only — and you have a gift rather than a coaster.
Why these make good gifts
Coasters are one of the few handmade items people genuinely use every day. A set of six in cotton, in colours that match someone’s kitchen, costs about two pounds in yarn and an afternoon of half-attention.
They also make a good first sale if you ever go that way — small, quick, and people understand what they’re paying for.
What’s next
You now know how to make a flat circle, which is most of the work in a crochet basket — a circle base, then stop increasing and work straight up the sides. It’s the same skill with one decision changed.
A granny square is the natural other direction: the same idea of building outward from a centre, but with corners.
For more first projects, see our full list of easy crochet patterns for beginners, with what each one teaches you and how long it takes.
Frequently asked questions
What yarn is best for crochet coasters?
100% cotton, worsted weight. It absorbs condensation and handles heat from hot mugs. Acrylic can soften and flatten under a hot cup, so it’s not suitable for this project.
How many stitches should be in each round of a crochet circle?
Each round adds the same number as round 1 contains. For double crochet that’s 12 per round: 12, 24, 36, 48. For single crochet it’s 6 per round.
Why is my crochet coaster ruffling?
Too many increases for the number of rounds. Count your stitches at the end of each round against the pattern.
Why is my crochet circle turning into a hexagon?
Your increases are stacking in the same positions each round. Shift where the increase falls each round so they spread out.
How big should a crochet coaster be?
Around 10 cm across. That fits a standard mug with a little margin. Larger than about 13 cm starts being a mug rug rather than a coaster.
Do crochet coasters actually protect the table?
Cotton ones do, if the fabric is dense — use a hook smaller than the yarn label suggests. They absorb condensation well, which is the main thing that damages wood.
How do you wash crochet coasters?
Cotton ones can go in the machine on a cool wash. Lay flat to dry and reshape while damp.
How long does it take to crochet a coaster?
Fifteen minutes for a three-round coaster with an edging, once you’re comfortable with the stitches.
You are welcome to sell items you make from this pattern. Please do not republish the pattern text — link to this page instead. Pattern © The Hook Line Stitcher.
How do you crochet a coaster?
Work a magic ring, then increase evenly in rounds until the circle reaches about 4 inches across. Finish with a slip stitch round or a single crochet border. It is one round of increases repeated — nothing else.
What size should a crochet coaster be?
Around 4 to 4.5 inches across. Big enough to catch drips from a standard mug, small enough that a set of four does not dominate a table.
What yarn should I use for coasters?
Cotton. It absorbs condensation, washes easily, and tolerates heat from a hot mug. Acrylic does not absorb and can be affected by heat, which makes it a poor choice for something a hot drink sits on.
Why is my crochet coaster not flat?
Your increase rate is off. A flat circle needs six increases per round in single crochet. Too few makes it cup into a bowl, too many makes the edge ruffle.
How long does a crochet coaster take?
About twenty to thirty minutes each, using roughly 20 yards of cotton. A set of four is one comfortable evening and one ball of yarn.





2 Comments on “How to Crochet a Coaster for Beginners: Easy Step-by-Step Tutorial”