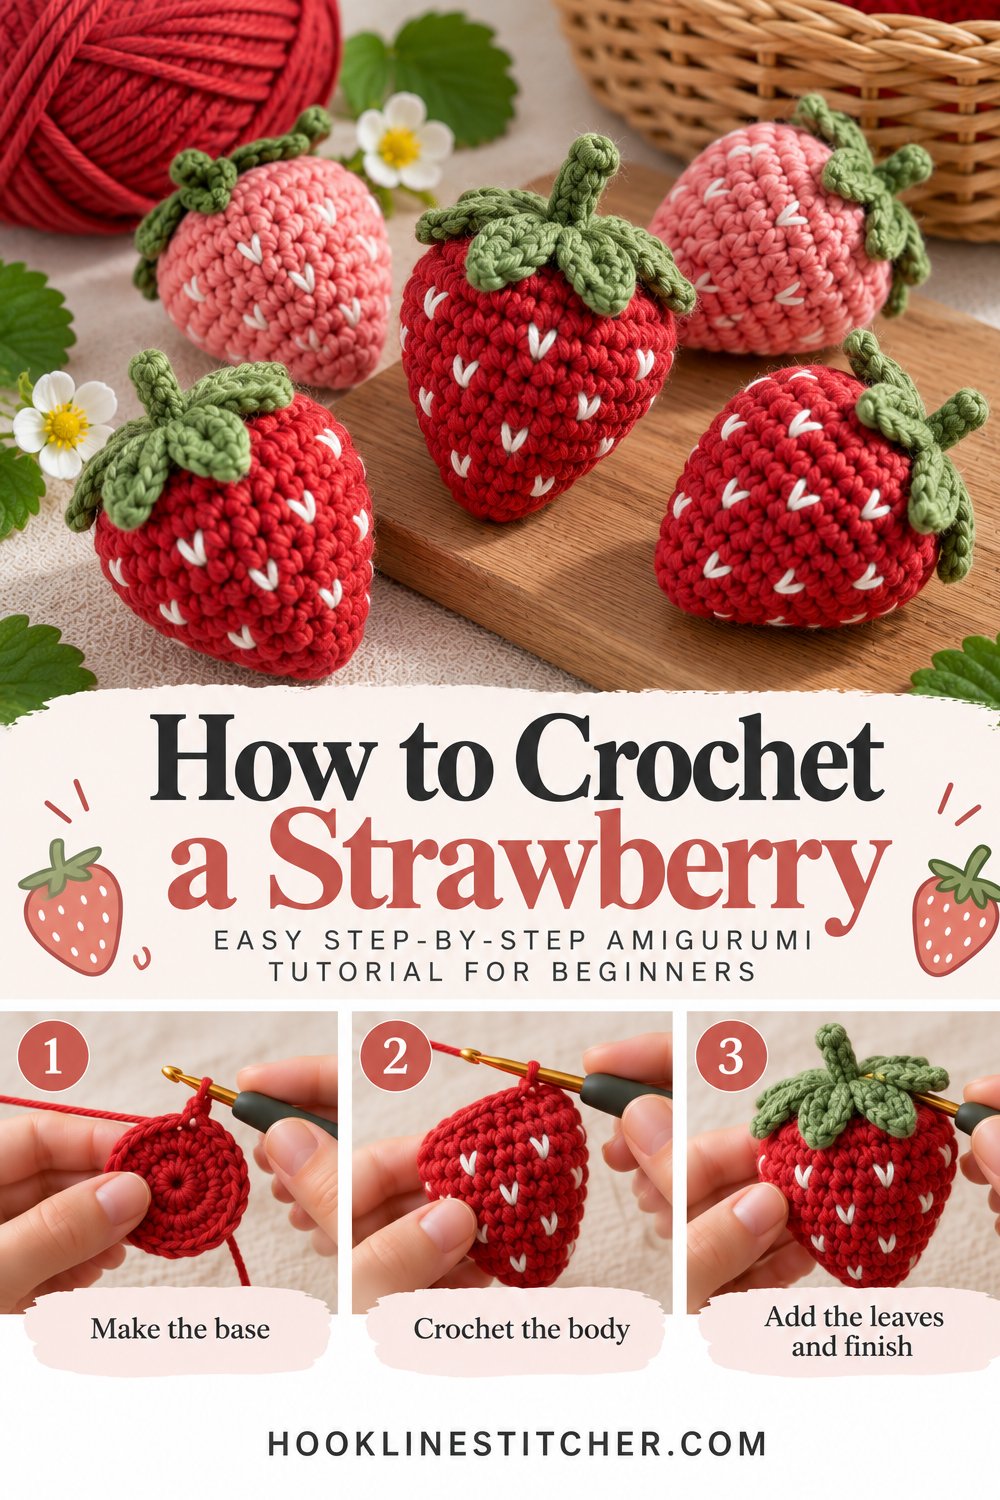
A crochet strawberry is small, quick and almost impossible to get wrong. It is one piece for the berry, one piece for the leafy top, and a handful of embroidered seeds. The whole thing takes about forty minutes and uses less yarn than a single dishcloth.
It also teaches something useful: how to make a shape that tapers to a point rather than closing into a sphere. That skill carries straight over into carrots, ice cream cones, and every pointed amigurumi you will make later.

From the shop · New pattern
A sweet cat-ear coaster in just 5 rounds. Beginner friendly, printable 7-page PDF for $4.99.
See the pattern →What you will need
| Item | What I recommend | Why |
|---|---|---|
| Yarn | Worsted weight (#4) in red and green, scraps | About 20 yards total |
| Yarn | A little white or cream | For the seeds |
| Hook | 3.5 mm | Dense fabric, no stuffing showing |
| Stuffing | Small amount of fibrefill | The berry is about 2.5 inches tall |
| Stitch marker | Or scrap yarn | Marks the round |
| Yarn needle | Blunt tapestry needle | Seeds and assembly |
Cotton yarn is particularly nice for fruit — it has a slight matte finish that reads as a real berry, and it holds its shape. Acrylic works fine too.
From the shop · New pattern
A sweet cat-ear coaster in just 5 rounds. Beginner friendly, printable 7-page PDF for $4.99.
See the pattern →Cathrinee’s Supply Kit
Everything you need for this project
Stitches you need to know
- Magic ring — the closed starting loop
- Single crochet (sc) — see how to crochet a single crochet stitch
- Increase (inc) — 2 sc into one stitch
- Invisible decrease (dec) — front loops only of the next two stitches, yarn over, pull through both
- Chain (ch) and slip stitch (sl st) — for the leafy top
- Straight stitch — a plain embroidery stitch for the seeds, no crochet involved
How to crochet a strawberry step by step
The berry
- In red: magic ring, 6 sc. Pull it closed and place your marker. Move it every round.
- Round 2: Increase in every stitch. 12 stitches.
- Round 3: (sc 1, inc) around. 18 stitches.
- Round 4: Single crochet around. 18 stitches.
- Round 5: (sc 2, inc) around. 24 stitches. This is the widest point — the shoulders of the berry.
- Rounds 6 and 7: Single crochet around. 24 stitches.
- Round 8: (sc 2, dec) around. 18 stitches.
- Round 9: Single crochet around. 18 stitches.
- Round 10: (sc 1, dec) around. 12 stitches.
- Stuff the berry now. Small pinches of fibrefill, pressed outward. Stuff it firmly — a soft strawberry loses its shape and goes from berry to blob.
- Round 11: Decrease around. 6 stitches.
- Round 12: Decrease around. 3 stitches. Fasten off leaving a tail, thread it through the last loops and pull tight.
Notice the shape you just made: wide at the top, narrowing gradually, then closing to a point. The trick is the even rounds between the decrease rounds — rounds 9 in particular. Decreasing every round closes a shape into a ball. Alternating decrease rounds with plain rounds makes it taper to a point instead. That is the whole difference between an apple and a strawberry.
The leafy top
- In green: magic ring, 6 sc. Pull closed.
- Round 2: Increase in every stitch. 12 stitches. Slip stitch into the next stitch to finish the round.
- Make the leaves: For each leaf, chain 4, then work a slip stitch back into each of the 3 chains, then slip stitch into the next stitch of the round. Repeat this five times around, spacing the leaves evenly. You will end up with five small pointed leaves radiating out from a flat green disc.
- Add a stem (optional): Chain 4 from the centre of the disc and slip stitch back down. Fasten off with a tail.
The seeds and assembly
- Sew the top onto the berry. Position the green disc over the wide end of the berry and stitch around the edge of the disc. Leave the leaf points free so they stand out rather than lying flat.
- Embroider the seeds. Thread white or cream yarn and make short straight stitches scattered over the red surface — one small stitch each, angled slightly, about eight to twelve of them. Stagger them rather than lining them up in rows. Real strawberry seeds are irregular, and irregular looks right.
- Weave in every end inside the berry and trim close.
Troubleshooting
My strawberry is a ball, not a berry. You decreased every round at the end. Add plain even rounds between the decrease rounds so the shape tapers gradually instead of closing fast.
The point at the bottom is blunt. Close with 3 stitches rather than 6, and pull the closing tail hard.
Stuffing is visible through the red. The hook is too big. Drop to 3.0 mm.
The berry went soft and lost its shape after a few days. Understuffed. Small fruit needs to be packed firmly — much firmer than a teddy bear.
The leafy top sits flat and looks like a green lid. You stitched the leaf points down along with the disc. Sew only around the inner disc edge and leave every leaf free.
My seeds look like stripes. Your straight stitches are too long and too aligned. Make each one shorter — barely more than a stitch wide — and scatter them at different angles.
I lost my place in the round. The marker has to move into the first stitch of every round. See how to count crochet stitches for reading your work, and why is my amigurumi lopsided, saggy, or showing stuffing for shape problems generally.
Variations to try
- A whole fruit bowl. The same tapering method gives you a carrot (orange, longer and thinner), a pear (wider at the bottom) and a lemon (points at both ends). Set out together they look wonderful.
- Strawberry keychain. Sport weight yarn and a 2.5 mm hook gives a berry about 1.5 inches tall. Add a chain loop.
- Play food. Make six berries and a small crochet basket to keep them in. Excellent for a toddler, and no small parts if you embroider everything.
- Pincushion. Stuff with rice or crushed walnut shell instead of fibrefill for weight, and it becomes a genuinely useful sewing tool.
- White strawberry. Cream body with pink seeds. Unexpected and very pretty.
- Strawberry garland. Thread six or seven onto a long chain for a kitchen or nursery.
A note on the tapering trick
If you take one thing from this project, take the relationship between decrease rounds and plain rounds. Decrease every round and any shape closes into a sphere. Put a plain round between each decrease and the same stitch counts produce a cone. Put two plain rounds between and you get a long gentle taper.
You will use this constantly. It is how amigurumi noses, tails, carrots, ice creams, hats and gnome bodies are all made, and once you see it you stop needing patterns for simple shapes altogether.
For more small projects, see small crochet patterns for beginners, and for more animals and characters, easy amigurumi patterns for beginners.
If you need to match your yarn to a hook, the Craft Yarn Council yarn weight system has the chart — go one or two hook sizes smaller than it suggests for amigurumi.
How do I make my crochet strawberry taper to a point instead of a ball?
Alternate decrease rounds with plain even rounds. Decreasing every round closes a shape into a sphere, while putting a plain round between each decrease makes it narrow gradually into a point. Close the final round with 3 stitches rather than 6 for a sharper tip.
How do I crochet the strawberry leaves?
Make a small flat green disc of 12 stitches, then for each leaf chain 4 and slip stitch back down the chain before moving to the next stitch of the round. Five leaves spaced evenly around the disc is right. Sew only the inner disc to the berry so the leaf points stay free.
How do I make crochet strawberry seeds look realistic?
Use short straight embroidery stitches in white or cream — each barely wider than a stitch — scattered at different angles rather than lined up in rows. Eight to twelve seeds is plenty. Real strawberry seeds are irregular, so irregular placement looks correct.
Why did my crochet strawberry go soft?
It is understuffed. Small fruit needs packing much more firmly than a stuffed animal because there is no internal structure to hold the shape. Add fibrefill in small pinches and press each one outward against the walls.
Can I use a crochet strawberry as a pincushion?
Yes, and it works well. Stuff it with rice or crushed walnut shell instead of polyester fibrefill so it has weight and holds pins firmly. Skip the hanging loop and sew the leafy top on securely.