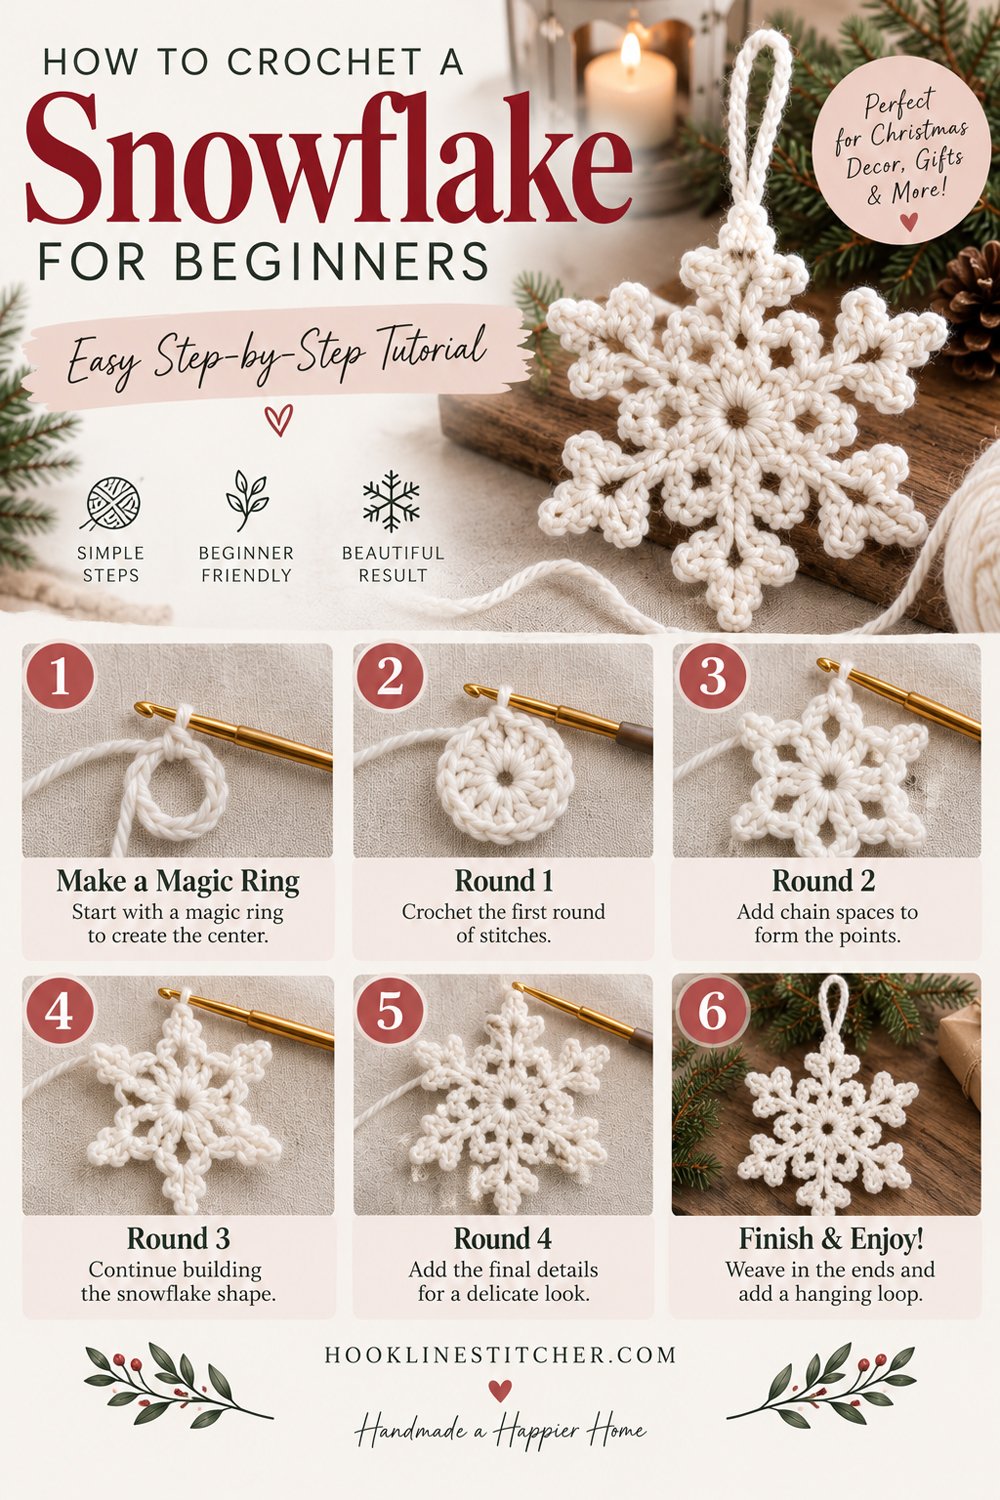
Crochet snowflakes have a reputation for being difficult, and it’s the wrong reputation attached to the right observation. Below is how to crochet a snowflake in DK cotton, plus how to stiffen it so it holds its shape.
The difficulty isn’t the pattern. It’s that snowflakes are traditionally made in crochet thread — a fine, slippery, unforgiving material worked on a 1.5mm steel hook, where every stitch is smaller than a grain of rice. That is genuinely hard, and it’s why beginners bounce off snowflakes.
The same pattern in DK cotton on a 3.0mm hook is a beginner project. It takes twenty minutes, you can see what you’re doing, and the result is chunkier and arguably nicer — it reads as a handmade snowflake rather than an attempt at lace.
Start here. Move to thread later if you want to, or don’t.

From the shop · New pattern
A sweet cat-ear coaster in just 5 rounds. Beginner friendly, printable 7-page PDF for $4.99.
See the pattern →What you need to know first
- Chain stitch
- Slip stitch
- Single crochet
- Half double crochet and double crochet
- The magic ring
Five stitches, which sounds like a lot until you realise they’re all in the first three things every beginner learns.
What you need
This post contains affiliate links. As an Amazon Associate I earn from qualifying purchases, at no extra cost to you. Full disclosure.
DK (3) cotton yarn in white, cream or pale grey. Cotton rather than acrylic — it holds a crisp shape and it stiffens properly, which acrylic doesn’t.
A 3.0mm hook, smaller than DK usually calls for. A tight fabric keeps the arms rigid.
A tapestry needle and scissors.
About 10 metres per snowflake. A scrap project.
From the shop · New pattern
A sweet cat-ear coaster in just 5 rounds. Beginner friendly, printable 7-page PDF for $4.99.
See the pattern →Cathrinee’s Supply Kit
Everything you need for this project
Terms
US crochet terms.
- MR = magic ring · ch = chain · sl st = slip stitch
- sc = single crochet (UK double crochet)
- hdc = half double crochet (UK half treble)
- dc = double crochet (UK treble)
How the shape works
The snowflake is a small centre with six arms radiating outward, and each arm is made the same way: you chain out to the tip, then work your way back down that chain using stitches of increasing height.
Short stitches at the tip, tall stitches at the base. Because taller stitches take up more space, the arm is narrow at the point and wider where it meets the centre — which is exactly what an arm should be.
It’s the same principle behind crochet leaves, hearts and petals. Stitch height creates shape, with no increasing or decreasing anywhere.
How to crochet a snowflake, arm by arm
The centre
Make a magic ring.
Ch 1, then work 6 sc into the ring. Join with a sl st into the first sc. (6)
Pull the ring closed firmly. A loose centre on a snowflake shows immediately.
No magic ring? Ch 4, sl st into the first chain to make a loop, and work the 6 sc into that loop.
The six arms
Each arm is worked out from one stitch of the centre and back down.
Ch 8.
Now working back down that chain toward the centre:
- sl st into the 2nd ch from the hook
- sc into the next ch
- hdc into the next 2 ch
- dc into the next 3 ch
Sl st into the next sc of the centre round.
That’s one arm. Repeat five more times — once into each remaining stitch of the centre.
After the sixth arm, join with a sl st, fasten off, and weave the ends into the back of the centre.
Making the arms branched
The plain version above looks like a six-pointed star. Adding side branches is what makes it read as a snowflake, and it’s one extra step per arm.
When you chain out, ch 8 as before, then before working back down:
Ch 4, sl st into the 4th chain from the hook.
That makes a small loop at the tip. Then work back down the main chain exactly as written.
For fuller arms, you can also add a branch partway down: after the hdc stitches, ch 3, sl st into the 3rd chain from the hook, then continue with the dc stitches.
Do the same thing on every arm or the snowflake will look lopsided. Count as you go.
Stiffening
This is what separates a snowflake that hangs on a tree from one that flops.
Sugar water — the traditional method. Dissolve two parts sugar in one part boiling water, let it cool slightly, soak the snowflake, squeeze out the excess, and pin it flat to dry. Cheap, effective, and it lasts for years in a dry house.
The catch: sugar attracts insects in humid conditions, and it can go slightly sticky. Fine for a tree in December, less good for something left out all year.
Fabric stiffener — buy it ready-made. Cleaner and more permanent. Follow the bottle.
PVA glue and water, half and half. Works, dries slightly shiny, and it’s what most people already have.
Steam and pin — dampen, pin flat, and leave to dry with no additive. Least effective, completely reversible, and enough if you’re using cotton and a tight gauge.
Pin it properly whichever method you use. Six arms, six pins, on a foam board or a folded towel. Pull each arm out straight and pin at the tip. An unpinned snowflake dries in whatever shape it happened to land in.
Troubleshooting
My snowflake is floppy. It hasn’t been stiffened, or your gauge is too loose. Go down a hook size and stiffen it.
The arms are different lengths. Count the chains. Every arm needs the same chain count and the same stitch sequence.
It’s curling rather than lying flat. Pin it flat while it dries. That’s most of what blocking is for.
There’s a hole in the centre. The magic ring wasn’t pulled fully closed. Tighten it, or close it from the back with the tail.
It looks like a star, not a snowflake. Add the branches. That’s the whole difference.
The arms twist. Normal as you work — they settle when the piece is blocked flat.
My stitches are too tight to work into on the way back down. Chain more loosely, or go up a hook size for the chain and back down for the stitches.
Variations
Larger snowflake. Ch 11 instead of 8, and add two more dc at the base of each arm.
Eight arms. Work 8 sc into the magic ring instead of 6. Less accurate — real snowflakes have six — and it looks fuller.
Silver or gold. A metallic thread held alongside the cotton catches the light. Harder to work with, worth it for a few.
Gift tags. Attach a small snowflake to a parcel with twine instead of a bow.
Garland. Chain 15 between snowflakes and join as you go.
A set of twelve. Different sizes and branch patterns, all in cream. Considerably more striking than twelve identical ones.
What’s next
More seasonal ideas: Easy Christmas Crochet Patterns for Beginners →
Frequently asked questions
Can beginners crochet snowflakes?
Yes, in yarn. The difficulty usually associated with snowflakes comes from crochet thread and tiny steel hooks, not from the pattern. DK cotton on a 3.0mm hook is beginner-level.
How do you stiffen crochet snowflakes?
Sugar water, commercial fabric stiffener, or a half-and-half mix of PVA glue and water. Soak, squeeze out the excess, and pin flat to dry.
What yarn should I use for crochet snowflakes?
DK cotton. It holds a crisp shape and stiffens well. Acrylic doesn’t stiffen reliably.
How long does it take to crochet a snowflake?
About twenty minutes, plus drying time if you stiffen it.
Why is my crochet snowflake floppy?
It hasn’t been stiffened, or the gauge is too loose. Use a hook a size smaller than the yarn suggests.
How do you make crochet snowflake arms branch?
Chain a few extra stitches at the tip and slip stitch back into the chain to form a small loop before working back down the main arm.
How much yarn does a crochet snowflake use?
About 10 metres of DK cotton. It’s a scrap project.
How do you crochet a snowflake?
Start with a magic ring and work a small centre round, then build six arms outward using chains and a mix of stitch heights, with picots at the tips. The whole snowflake is usually one or two rounds of work.
How do I make crochet snowflakes stiff?
Block them. Dampen the finished snowflake, pin it into shape on a flat surface and let it dry completely. Cotton holds the shape like card. For permanent stiffness, use a fabric stiffener or a diluted white glue solution.
What yarn is best for crochet snowflakes?
Cotton thread or fine cotton yarn with a small hook. Cotton gives sharp stitch definition and holds a blocked shape, which is exactly what a snowflake needs. Acrylic stays soft and loses its points.
How long does a crochet snowflake take?
About fifteen to twenty minutes each once you know the pattern, using roughly 8 yards of yarn. They store flat, so a batch of twenty fits in an envelope.
Do all crochet snowflakes have six arms?
Traditionally yes, because real snowflakes are six-sided. You can work eight arms for a fuller, more decorative look, but six is what reads instantly as a snowflake.




