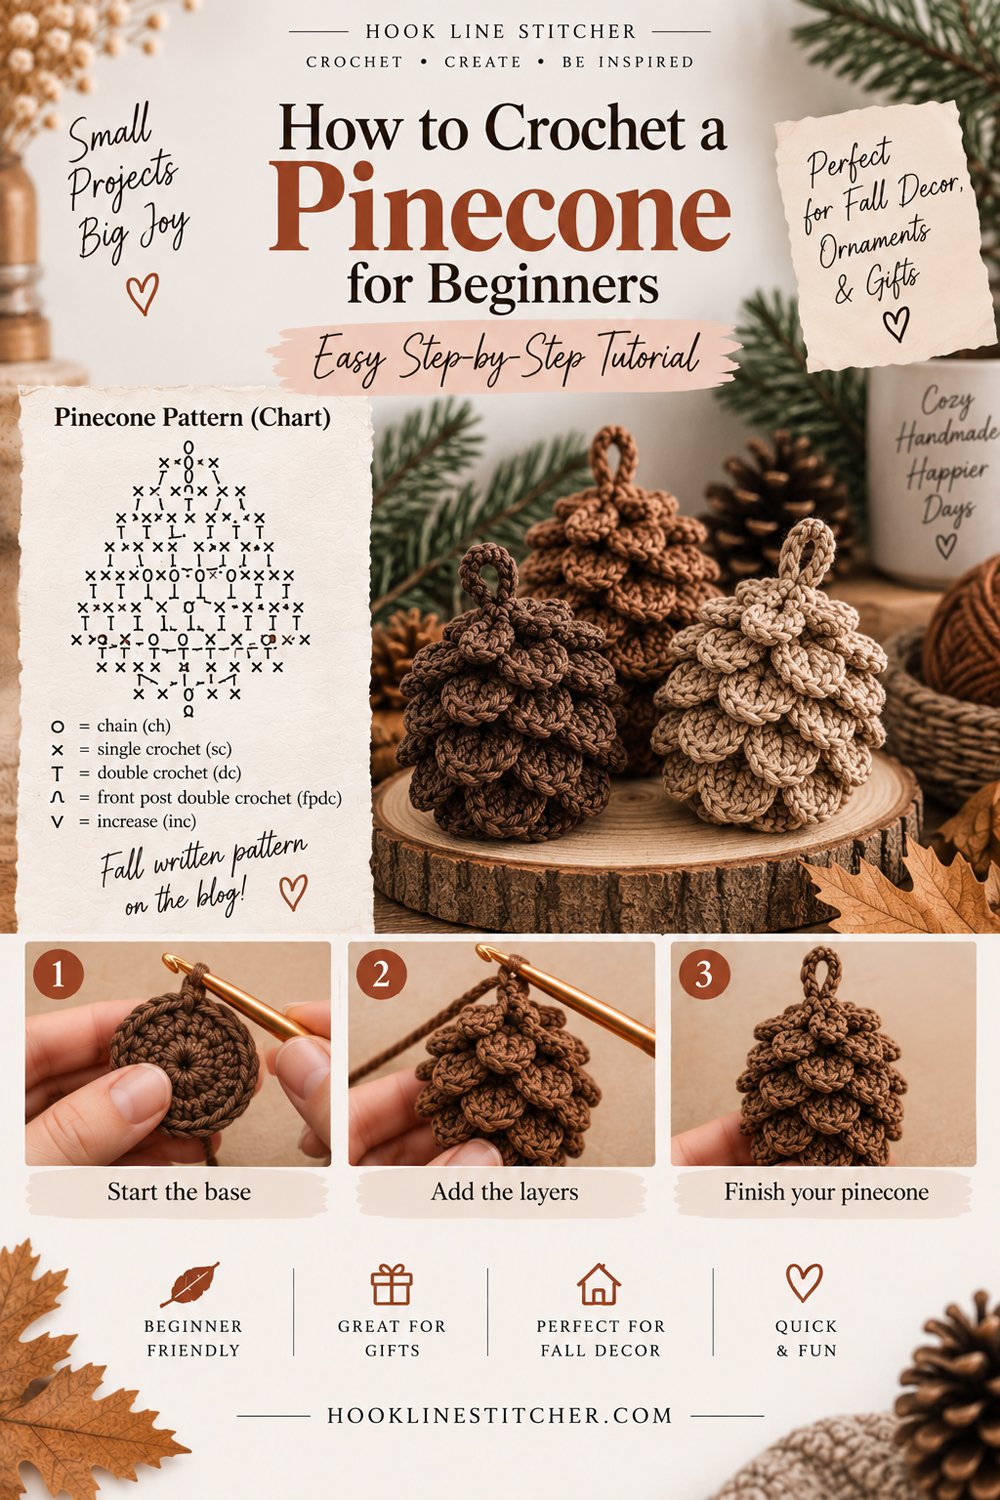
Learning how to crochet a pinecone is the most involved project in this autumn series, and it’s still very achievable for a confident beginner.
The reason it takes a little more patience is the scales. A real pinecone is covered in overlapping scales arranged in rows, and to recreate that in crochet you make the cone first, then go back over it and add the scales.
The trick that makes this possible is working the cone in back loops only. Every round leaves a line of unused front loops running around the outside. Those front loops become a ready-made row for each layer of scales. You’re essentially building yourself a scaffold, then decorating it.
About ninety minutes. Finished pinecone roughly 8 cm tall.

From the shop · New pattern
A sweet cat-ear coaster in just 5 rounds. Beginner friendly, printable 7-page PDF for $4.99.
See the pattern →What you need to know first
- Single crochet
- Double crochet
- The magic ring
- Working in a continuous spiral
- Increasing and decreasing
- Back loop only and front loop only
If you’ve made a crochet bunny or another amigurumi animal, you’re ready for this.
What you need
Worsted weight (4) yarn in brown. A warm mid-brown or a caramel shade shows the scales better than very dark brown, where the detail disappears.
A 3.5mm hook.
A small amount of stuffing, a stitch marker, and a tapestry needle.
About 35 metres.
From the shop · New pattern
A sweet cat-ear coaster in just 5 rounds. Beginner friendly, printable 7-page PDF for $4.99.
See the pattern →Cathrinee’s Supply Kit
Everything you need for this project
Crochet terms used
US crochet terms.
- MR = magic ring · sl st = slip stitch
- sc = single crochet (UK double crochet)
- dc = double crochet (UK treble)
- inc = 2 sc into the same stitch · dec = decrease
- BLO = back loop only · FLO = front loop only
How a crochet pinecone works
Worth understanding before you start.
Stage 1 — the cone. You work a small cone from the tip downward. Most rounds are worked into the back loop only, which leaves the front loops of those rounds sitting free on the surface.
Stage 2 — the scales. You go back to the bottom of the cone and work into those free front loops, row by row, moving up toward the tip. Each scale is a small cluster of double crochets. Because the rounds get narrower toward the tip, the scales naturally overlap like real ones.
Step 1: Crochet the cone
Start at the tip. Place a stitch marker in the first stitch of each round.
- R1: 6 sc in MR — (6)
- R2: (2 sc, inc) x2, BLO — (8)
- R3: (3 sc, inc) x2, BLO — (10)
- R4: (4 sc, inc) x2, BLO — (12)
- R5: (5 sc, inc) x2, BLO — (14)
- R6: (6 sc, inc) x2, BLO — (16)
- R7–R9: sc in each st around, BLO, three rounds — (16)
Every round from R2 to R9 is worked in the back loop only, including the increases. You should see a line of little front loops ringing the outside of each round.
Now close the base, working through both loops as normal:
- R10: (2 sc, dec) x4 — (12)
Stuff firmly.
- R11: dec x6 — (6)
Fasten off, run the tail through the front loop of each remaining stitch, and pull tight to close. Weave the tail inside.
Step 2: Crochet the scales
Turn the pinecone upside down so the base faces up.
Find the free front loops of R9 — the lowest ring of front loops, nearest the base. Join your yarn with a sl st into any one of them.
Work the scales around this ring: sl st into the next front loop, then 3 dc into the following front loop. Repeat all the way around.
R9 has 16 front loops, so you’ll make 8 scales.
When you reach where you started, sl st up into the front loops of R8 — the next ring toward the tip — and repeat the scale pattern around that ring.
Keep moving up, one ring at a time, until you reach R2.
The rings get smaller as you go — 16, 16, 16, 14, 12, 10, 8 front loops — so the number of scales per ring shrinks: 8, 8, 8, 7, 6, 5, 4. That’s what makes the scales overlap and taper toward the tip, just like a real pinecone.
Fasten off at the tip and weave the end inside.
Step 3: Add a hanging loop (optional)
For an ornament: thread yarn through the tip, ch 12, then sl st back down every chain, and secure it to the tip with a few stitches.
Troubleshooting your crochet pinecone
I can’t find the front loops. You worked those rounds through both loops. Rounds 2 to 9 must be back loop only — otherwise there’s nothing to work the scales into.
The scales are flat, not raised. Make sure you’re working 3 dc into a single front loop. That cluster is what makes each scale stand out.
The pinecone is lopsided. A stitch count drifted in the cone. Count every round against the pattern — see how to count crochet stitches.
The scales don’t cover the cone. Use 4 dc per scale instead of 3 for fuller coverage.
It’s too hard to see the front loops in dark yarn. Use a lighter brown. Very dark yarn hides the detail you need to follow.
Stuffing shows through. The hook is too large. Go down a size. More in amigurumi problems and fixes.
Variations
- Frosted pinecone: add a round of white or cream at the tips of the scales for a snowy look — perfect for Christmas.
- Larger pinecone: add two more increase rounds and two more straight rounds to the cone.
- Pinecone ornaments: add a hanging loop and a small bow, alongside your Christmas ornaments.
- A bowl of pinecones: make three or four sizes and mix them with crochet acorns and leaves.
- Gold-dipped look: hold a strand of metallic thread with your yarn for the scale rounds only.
Frequently asked questions
How do you crochet a pinecone?
Work a small stuffed cone with most rounds in the back loop only, leaving front loops free. Then go back and work clusters of double crochet into those front loops, ring by ring from the base to the tip, to create overlapping scales.
Is a crochet pinecone hard to make?
It’s the most involved of the autumn projects, but the techniques are all beginner-friendly. It mostly takes patience.
How long does it take to crochet a pinecone?
About ninety minutes.
Why is my crochet pinecone not scaly?
The cone rounds were worked through both loops, so there are no front loops for the scales. Rounds 2 to 9 need to be back loop only.
What yarn is best for a crochet pinecone?
Worsted weight in a warm mid-brown or caramel. Very dark brown hides the scale detail.
Can I use crochet pinecones as Christmas ornaments?
Yes. Add a hanging loop to the tip and a small bow, or add white tips to the scales for a frosted look.




