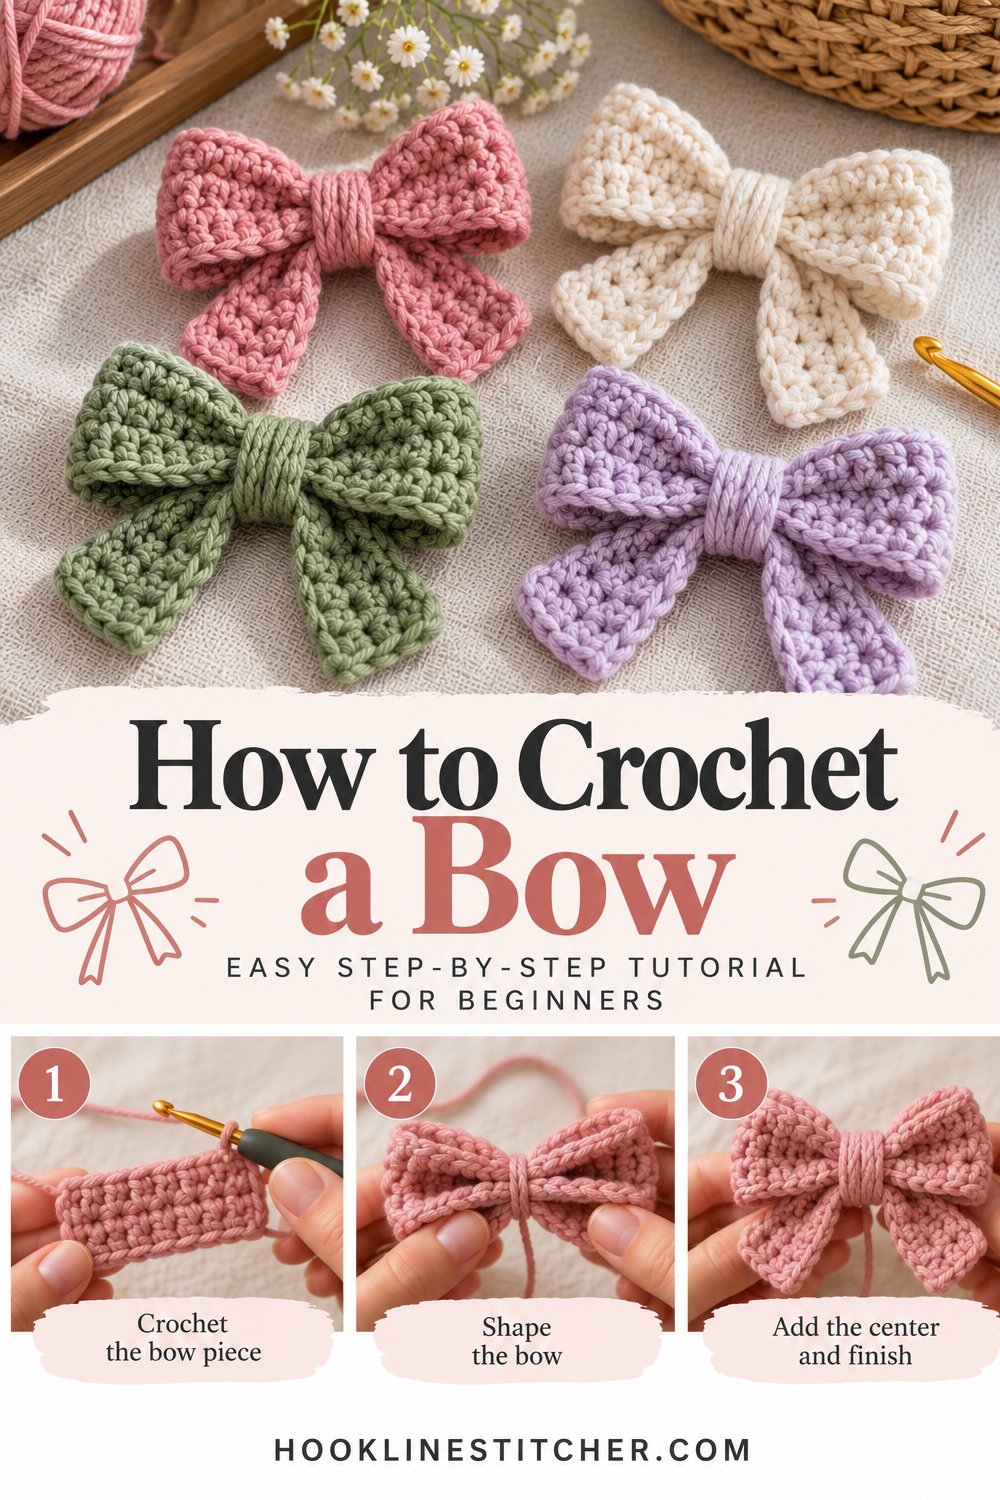
A crochet bow is the fastest thing in this entire site. Fifteen minutes, one rectangle, a bit of wrapped yarn, done. And bows are everywhere at the moment — on hair clips, on bags, on gift wrapping, sewn onto hats and cardigans as a finishing detail.
It is also the perfect project for the very first thing you ever make. There is no shaping, no counting rounds, no fitting, and if it comes out slightly wonky nobody can tell, because bows are meant to look soft and slightly imperfect.
What you will need
| Item | What I recommend | Why |
|---|---|---|
| Yarn | Worsted weight (#4), about 15 yards | Anything you have; this is a scrap project |
| Hook | 4.0 mm or 5.0 mm | Either works; smaller gives a crisper bow |
| Scissors | Any | Cutting the wrap yarn |
| Yarn needle | Blunt tapestry needle | Weaving in ends |
| Hair clip, elastic or pin | Optional | Depends what you are making it for |
Yarn with a slight sheen — cotton, a cotton blend, or a soft acrylic — makes a smarter bow than something very fuzzy, because the shape stays defined. But this is a fifteen-minute project, so experiment freely.
Cathrinee’s Supply Kit
The beginner basics I recommend
Stitches you need to know
Two. That is all.
- Chain (ch) — see how to crochet a chain stitch
- Half double crochet (hdc) — yarn over, insert your hook, yarn over and pull through, yarn over and pull through all three loops
If you would rather use a stitch you already know, single crochet works perfectly and just takes a few more rows. Easy crochet stitches for beginners covers all the options if you want to compare.
How to crochet a bow step by step
The rectangle
- Chain 20. This chain becomes the width of the finished bow — roughly how far it will spread from tip to tip once pinched. Twenty chains gives a bow about 4 inches wide, which suits a hair clip or a bag. For a small bow on a baby headband, chain 14. For a large decorative bow, chain 28.
- Row 1: Half double crochet into the third chain from the hook, then into every chain across. Keep it loose.
- Row 2: Chain 1, turn, half double crochet into every stitch across.
- Rows 3 to 6: Repeat row 2. Six rows total gives a bow with good body. Four rows makes a flatter, more delicate bow; eight rows makes a chunky one.
- Fasten off, leaving a short tail, and weave it in now. It is much easier before the bow is assembled than after.
You now have a small rectangle. It does not look like a bow yet and that is completely normal.
The centre wrap
- Find the middle. Lay the rectangle flat and pinch it across the centre, gathering the fabric into a narrow pleat. Squeeze it properly — a loose pinch gives a limp bow.
- Cut a 20-inch length of yarn. Use the same colour for a subtle bow, or a contrasting one for a deliberate accent.
- Wrap it around the pinch. Start at the back, hold one end in place with your thumb, and wind the yarn tightly around the gathered centre six to ten times. Keep each wrap sitting neatly beside the last rather than piling up.
- Tie it off at the back. Bring both ends together behind the bow and knot them twice. Do not trim them short yet.
- Shape the bow. Pull the loops outward with your fingers, one side at a time, until both halves look even. Fluff and press the fabric until it sits how you want. This takes about thirty seconds and makes a surprising difference.
- Weave in the wrap ends behind the centre so they disappear into the knot, then trim close.
Attaching it
- For a hair clip: stitch the back of the wrapped centre directly to a snap clip or alligator clip using your yarn needle, going through several times.
- For a hair tie: before you knot the wrap yarn, thread it through a hair elastic so the elastic is caught in the wrap.
- For a bag or hat: sew through the back of the centre and into the item, four or five passes so it holds.
- For gift wrap: thread a length of yarn under the wrap and use it to tie the bow onto the parcel.
Troubleshooting
My bow is limp and floppy. Either the rectangle needs more rows, or your pinch was too loose. Undo the wrap, gather the centre much more tightly, and rewrap.
The two halves are different sizes. Your pinch was off centre. Undo the wrap, fold the rectangle in half to find the true middle, mark it with a pin, and rewrap there.
The wrap yarn keeps sliding off the pleat. Wrap tighter and add more turns. Ten wraps hold far better than five.
My rectangle is getting wider or narrower. You are gaining or losing a stitch at the row ends. Count after each row. Why are my crochet rows getting wider or narrower explains exactly where the error happens.
The edges are curling. With only six rows there is not enough fabric weight to stop a little curl. It mostly disappears once the centre is pinched. If it bothers you, add a round of single crochet all the way around the rectangle before wrapping.
It looks handmade in the bad way. Nine times out of ten this is the shaping step. Spend a full minute pulling the loops out and pressing the fabric flat with your fingers.
Variations to try
- Double-layer bow. Make two rectangles, one slightly smaller, stack them and wrap both centres together. Much more substantial.
- Tails. Make a second, narrower rectangle, pinch it in the middle, and wrap it into the back of the main bow so two ends hang down.
- Scalloped edge. Work a round of (3 dc into one stitch, skip 1, slip stitch) around the rectangle before wrapping.
- Striped bow. Change colour every two rows. Because the bow folds, the stripes come out symmetrical on both loops.
- Tiny bows for gifts. Chain 10, work four rows. They take five minutes each and look lovely tied onto a parcel or a jar.
- Bow on a bag. Sew one onto a tote bag or a mini bag as a finishing detail.
- Bow on a headband. Attach one to a crochet headband or an ear warmer instead of using the twisted centre.
Why bows are worth making in batches
This is one of very few crochet projects where making ten is barely more effort than making one. The rows are short enough that you finish a rectangle in ten minutes, and the wrapping goes quickly once your hands know it.
If you make things to sell or give, a set of bows in coordinating colours is an easy, low-cost product, and it uses the awkward leftovers that are too small for anything else. A single skein of worsted weight yarn will make something like fifteen bows.
For more quick projects, see small crochet patterns for beginners and easy crochet gifts for beginners.
If you are unsure what weight your yarn is, the Craft Yarn Council yarn weight system matches the label symbol to a hook size.
How many chains do I need for a crochet bow?
Chain 20 for a bow about 4 inches wide, which suits a hair clip or a bag. Chain 14 for a small baby headband bow and 28 for a large decorative one. The chain sets the width of the finished bow from tip to tip.
Why is my crochet bow floppy?
Either the rectangle has too few rows or the centre pinch was too loose. Add two more rows for body, and when you gather the middle, squeeze it into a genuinely tight pleat before wrapping. Six to ten firm wraps hold far better than a few loose ones.
How do I attach a crochet bow to a hair clip?
Stitch the back of the wrapped centre directly onto a snap clip or alligator clip with a yarn needle, passing through several times so it cannot twist loose. For a hair tie instead, thread the elastic through the wrap yarn before you knot it off.
How long does it take to crochet a bow?
About fifteen minutes, including the wrapping and shaping. Small gift bows take around five minutes each, and one standard skein of worsted weight yarn will make roughly fifteen bows.
Can I make a crochet bow with single crochet instead?
Yes. Single crochet works perfectly and gives a slightly denser bow — you will just need a few more rows to reach the same height, around eight or nine instead of six.




