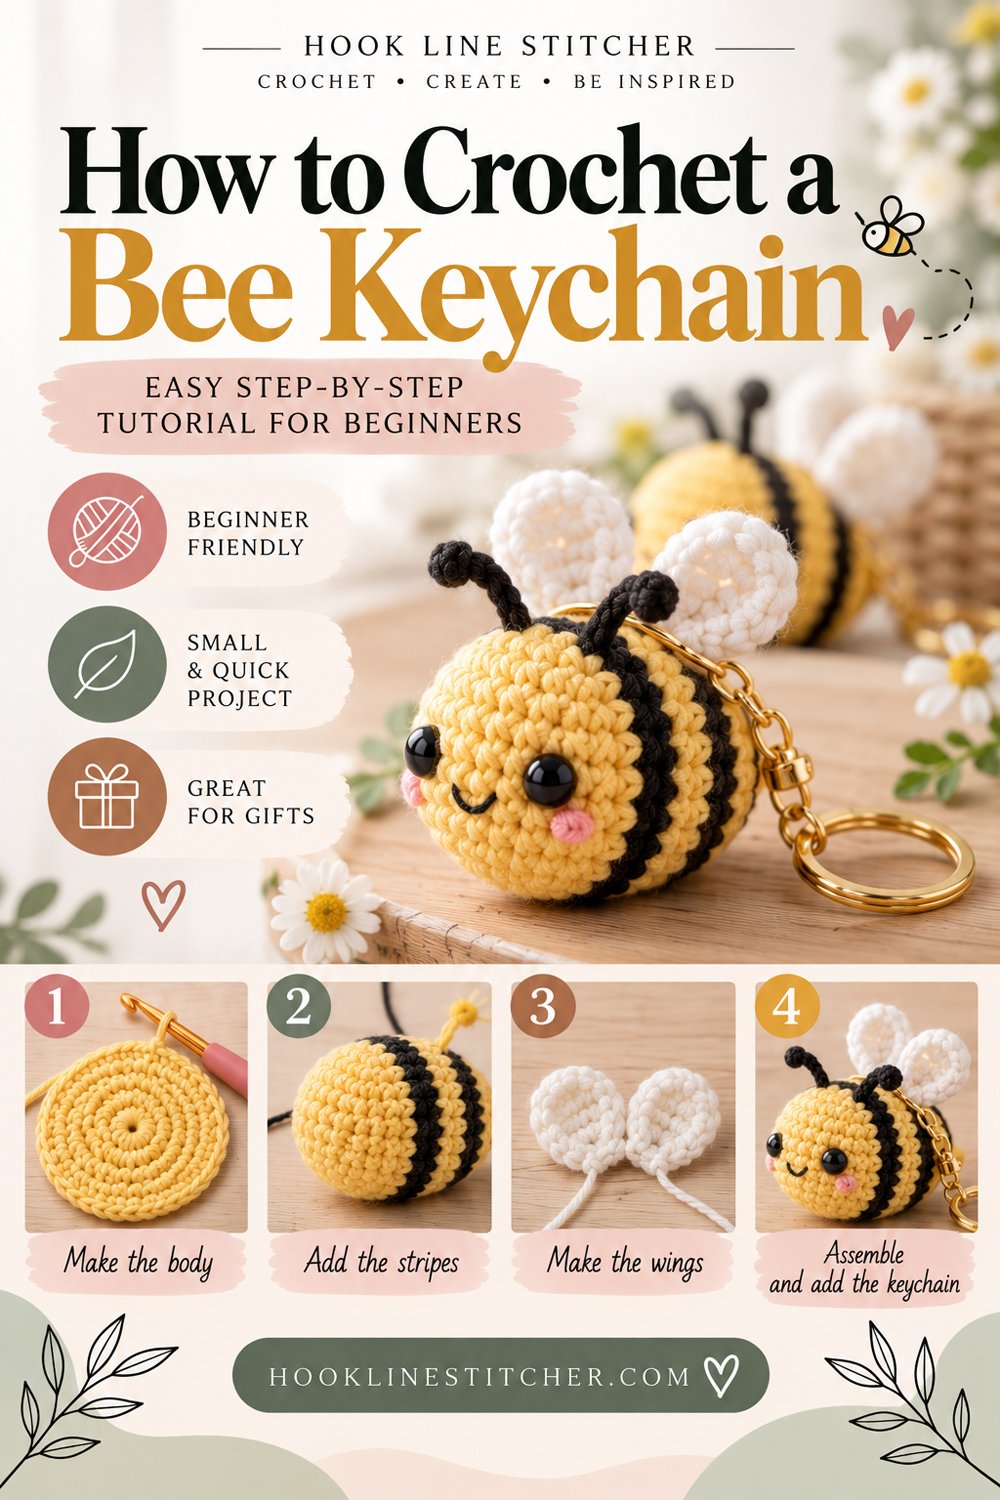
A bee keychain takes half an hour, uses scraps of yarn you already own, and is the kind of small handmade thing people are genuinely pleased to be given. Tiny amigurumi clipped to bags and keys is one of the biggest crochet trends going, and the bee is the easiest one in the whole category — a small striped oval, two flat wings, and a loop.
It is also a very good way to practise colour changes on something that only takes thirty minutes, so a mistake costs you almost nothing.

From the shop · New pattern
A sweet cat-ear coaster in just 5 rounds. Beginner friendly, printable 7-page PDF for $4.99.
See the pattern →What you will need
| Item | What I recommend | Why |
|---|---|---|
| Yarn | Worsted weight (#4) in yellow and black, scraps | About 15 yards total for the whole bee |
| Yarn | A little white | For the wings |
| Hook | 3.0 mm to 3.5 mm | Tight fabric, no stuffing showing |
| Stuffing | Small pinch of fibrefill | The body is barely bigger than a walnut |
| Stitch marker | Or scrap yarn | Marks the round |
| Yarn needle | Blunt tapestry needle | Assembly |
| Keyring or lobster clip | Any small one | The hardware |
Because this is so small, the yarn and hook pairing matters. A large hook on a piece this size leaves visible gaps immediately. If in doubt, go smaller.
From the shop · New pattern
A sweet cat-ear coaster in just 5 rounds. Beginner friendly, printable 7-page PDF for $4.99.
See the pattern →Cathrinee’s Supply Kit
Everything you need for this project
Stitches you need to know
- Magic ring — the closed starting loop
- Single crochet (sc) — everything, see how to crochet a single crochet stitch
- Increase (inc) — 2 sc into one stitch
- Invisible decrease (dec) — front loops only of the next two stitches, yarn over, pull through both
- Chain (ch) and slip stitch (sl st) — for the hanging loop and the wings
How to change colour cleanly
You will switch between yellow and black four or five times on a piece this small, so it is worth doing properly. On the last stitch before the change, work the single crochet until you have two loops on your hook, then drop the old colour, pick up the new one and finish the stitch with it. The join sits inside the stitch rather than on top of it, and you get a clean stripe line instead of a stepped one.
Leave the tails inside the body as you go and weave them in at the end. Do not cut them short — you need enough to thread a needle.
How to crochet a bee keychain step by step
The body
- In yellow: magic ring, 6 sc. Pull it closed, place your marker.
- Round 2: Increase in every stitch. 12 stitches.
- Round 3: Single crochet around. 12 stitches. Change to black on the last stitch.
- Round 4: In black, single crochet around. 12 stitches. Change to yellow on the last stitch.
- Round 5: In yellow, single crochet around. Change to black on the last stitch.
- Round 6: In black, single crochet around. Change to yellow on the last stitch.
- Round 7: In yellow, single crochet around. You now have four visible stripes and a small barrel shape.
- Round 8: (sc 1, dec) around. 8 stitches.
- Stuff the body. A pinch of fibrefill, pressed in with the end of your hook. Firm but not straining the stitches.
- Round 9: Decrease around until you have 4 stitches. Fasten off leaving a tail, thread it through the remaining loops and pull tight to close.
The wings (make 2)
- In white: chain 6. Work 2 sc, 2 hdc, 2 sc along the chain, then work a slip stitch into the end. Now work back along the other side of the same chain the same way: 2 sc, 2 hdc, 2 sc. Slip stitch to join into a small pointed oval. Fasten off leaving a tail.
- Do not stuff the wings. They should be flat. If they curl, press them flat between your fingers for a few seconds — worsted acrylic holds a shape surprisingly well.
Assembly
- Sew the wings on. Place them side by side on the top of the bee, on one of the yellow stripes, angled outward in a V. Stitch across the narrow end of each wing several times so they stay put but the wide end stays free to move.
- Add the face. With black yarn, two tiny straight stitches for eyes on the front yellow stripe, spaced about 3 stitches apart. Optionally one small horizontal stitch below for a smile. Keep it minimal — on a piece this small, more detail reads as mess.
- Make the hanging loop. Attach yellow yarn to the top of the bee between the wings, chain 8, then slip stitch back down the chain to make it firm. Fasten off and secure both ends inside the body.
- Attach the hardware. Thread the keyring or lobster clip through the loop and close it. If your clip has no opening, thread the chain through the clip before you slip stitch back down it.
- Weave in every end. Thread each tail, run it through several stitches inside the body, change direction once, trim close. This matters more on a keychain than on a shelf ornament, because a keychain gets pulled about all day.
Troubleshooting
My stripes are stepped rather than level. You changed colour at the start of the round instead of on the final stitch of the previous one. Change on the last stitch, as described above.
Stuffing shows between the stitches. The hook is too big for the yarn. Drop to 3.0 mm.
The wings flop backward. You stitched only the very tip. Sew across the whole narrow end, two or three stitches wide.
The body looks like a ball, not a bee. You need the barrel shape — make sure rounds 3 to 7 are all worked even with no increases. If it is spherical, you increased somewhere you should not have.
There is a hole at the end. The magic ring was not pulled tight, or the closing stitches were not cinched. Thread the tail around the remaining loops and pull hard.
I lost my place in the round. Move the marker into the first stitch of each new round. On a 12-stitch round it is easy to drift a stitch without noticing. How to count crochet stitches shows how to read where you are.
Variations to try
- Bumblebee proportions. Increase to 18 stitches instead of 12 and work six even rounds for a fatter, fuzzier bumblebee.
- Antennae. Chain 4 in black, slip stitch back, and sew two of them to the front. Small and very effective.
- Matching flower. Make a small crochet flower and hang it from the same keyring.
- A whole set. The same body shape in different colours gives you a ladybird (red with black spots), a wasp (thinner stripes) or a caterpillar (join three bodies).
- Bag charm instead of keychain. Swap the keyring for a lobster clip and a short length of chain.
- Bee garland. Make five bees and space them along a long chain.
Why tiny amigurumi sells
If you make things to sell, small amigurumi is worth paying attention to. A bee keychain costs almost nothing in materials, takes half an hour, is light enough that postage stays cheap, and photographs well against a plain background. It is also an easy impulse purchase, which matters far more than people expect.
Just be honest in how you describe it — a handmade item that has small parts should say so, and anything sold as suitable for children needs the eyes embroidered rather than attached.
For more projects that finish in under an hour, see small crochet patterns for beginners and easy crochet gifts for beginners.
If you are unsure about your yarn weight, check the Craft Yarn Council yarn weight system, then go one or two hook sizes smaller for amigurumi.
How long does it take to crochet a bee keychain?
About 30 minutes for the whole bee including the wings and the hanging loop. It uses roughly 15 yards of yarn in total, so it is a genuinely scrap-friendly project.
How do I get clean stripes on a crochet bee?
Change colour on the last stitch of the round rather than at the start of the next one. Work the single crochet until two loops remain on your hook, drop the old colour, pick up the new one and finish the stitch with it. The join then sits inside the stitch.
What hook size should I use for a bee keychain?
A 3.0 mm to 3.5 mm hook with worsted weight yarn. Because the bee is so small, a large hook leaves visible gaps almost immediately and the stuffing shows. When in doubt, go smaller.
Why do my bee wings flop backward?
You sewed only the very tip of each wing. Stitch across the whole narrow end, two or three stitches wide, so the base is anchored while the wide end stays free to move.
Are crochet bee keychains safe for children?
Only if you embroider the eyes in yarn rather than using safety eyes or beads, and weave in every end thoroughly. A keychain gets pulled about constantly, so any attached hard part is a risk for a small child.