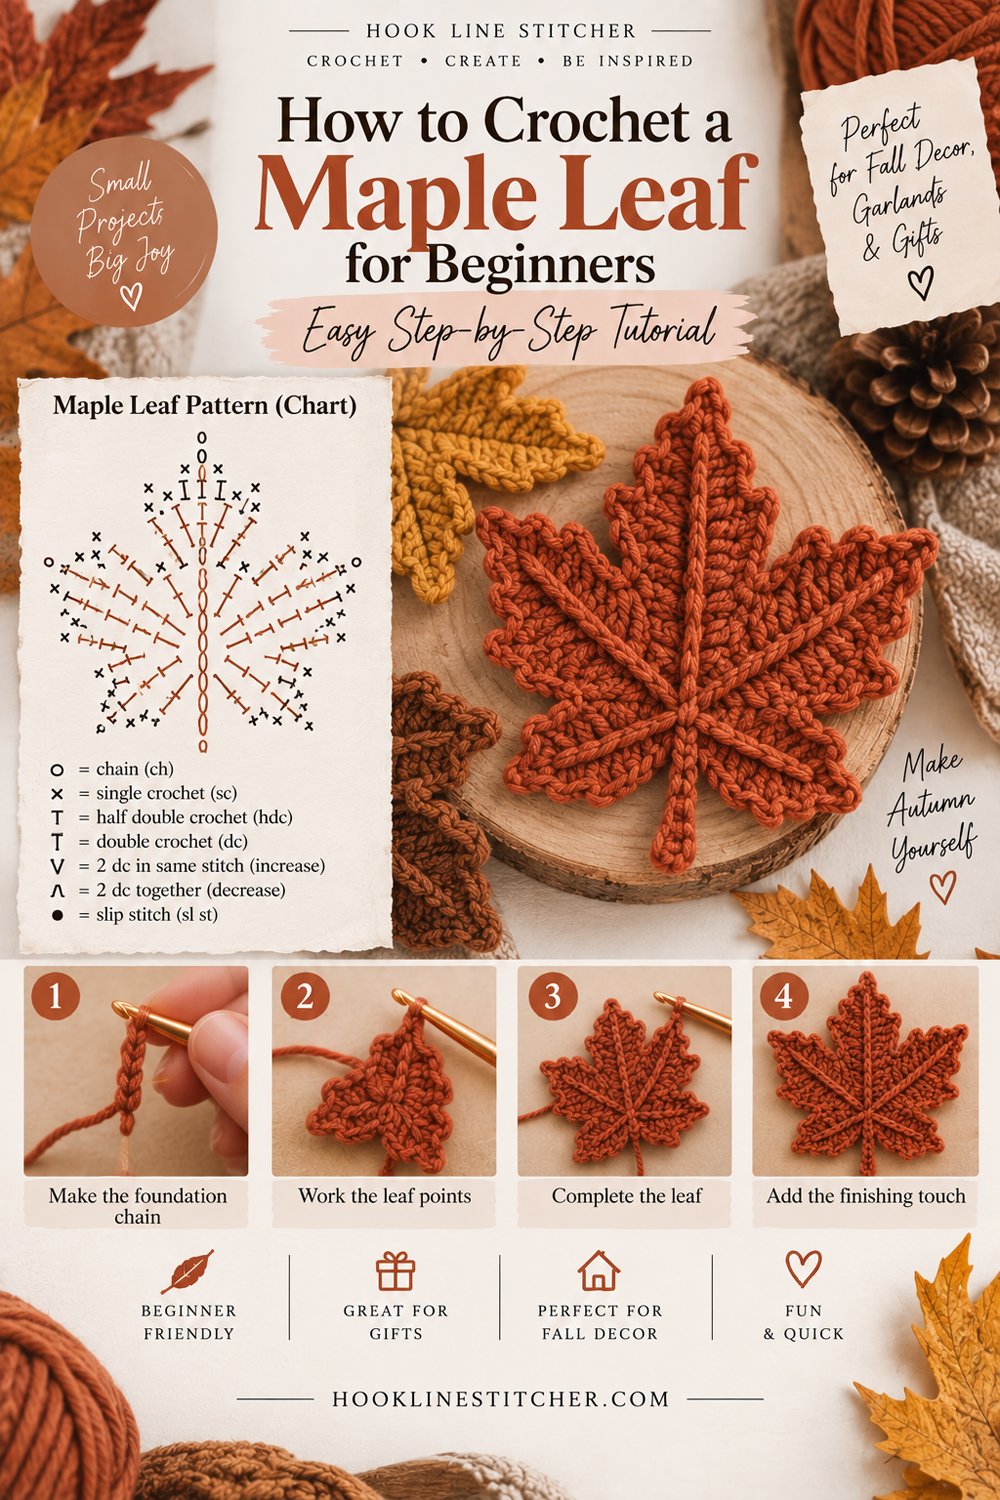
If you want to learn how to crochet a maple leaf, think of it as a star rather than a leaf.
That’s the key idea. A maple leaf has five pointed lobes radiating from a central point, which is exactly how a crochet star is built. You start with a small ring of stitches, then work each point outward as a chain and back down with stitches of increasing height — short at the tip, tall at the base. It’s the same idea used for the arms of a crochet snowflake.
The one difference from a star is what makes it read as maple: the three top points are longer than the two lower ones. That single adjustment changes a star into a leaf.
About twenty minutes. Finished leaf roughly 9 cm across.
What you need to know first
- Chain stitch
- Slip stitch
- Single crochet, half double crochet, double crochet and treble crochet
- The magic ring
Treble crochet is the only one that might be new. It’s double crochet with one extra yarn over at the start: yarn over twice, insert your hook, yarn over and pull up a loop (four loops on the hook), then yarn over and pull through two loops, three times.
What you need
Worsted weight (4) yarn. Maple leaves turn the most dramatic autumn colours of any tree — deep red, scarlet, burnt orange and bright gold all look right. A mix of colours makes a lovely set.
A 4.0mm hook.
A tapestry needle and scissors.
About 8 metres per leaf.
Cathrinee’s Supply Kit
The beginner basics I recommend
Crochet terms used
US crochet terms.
- MR = magic ring · ch = chain · sl st = slip stitch
- sc = single crochet (UK double crochet)
- hdc = half double crochet (UK half treble)
- dc = double crochet (UK treble)
- tr = treble crochet (UK double treble)
- st(s) = stitch(es)
Step 1: Crochet the centre
Make a magic ring.
Ch 1, then work 10 sc into the ring. Join with a sl st into the first sc. (10)
Pull the ring closed tightly. A loose centre shows clearly on a flat leaf.
Each point in the next step uses 2 stitches of this centre, so 10 stitches makes 5 points.
Step 2: Crochet the three long points
These are the top three lobes of the leaf.
For each long point:
- Ch 8.
- Working back down the chain: sl st into the 2nd ch from the hook, sc into the next ch, hdc into the next ch, dc into each of the next 2 ch, tr into each of the last 2 ch.
- Skip 1 stitch of the centre, then sl st into the next stitch.
Work this three times in a row, making three long points side by side.
Step 3: Crochet the two short points
These are the lower side lobes.
For each short point:
- Ch 6.
- Working back down the chain: sl st into the 2nd ch from the hook, sc into the next ch, hdc into the next ch, dc into the next ch, tr into the last ch.
- Skip 1 stitch of the centre, then sl st into the next stitch.
Work this twice. Your final slip stitch should land back where the first long point began.
Step 4: Crochet the stem
The stem sits in the gap between the last short point and the first long point — at the bottom of the leaf.
Ch 8, then sl st into the 2nd ch from the hook and into each chain back down to the leaf. Sl st into the centre and fasten off.
Slip stitching back down doubles the chain so the stem holds its shape. Weave in all the ends.
Step 5: Shape the leaf
Maple leaves look best slightly spread, with the points angled outward.
Dampen the leaf and pin each point in position on a folded towel or foam mat — the middle long point straight up, the two outer long points angled out at roughly ten and two o’clock, and the short points angled outward and slightly down. Let it dry completely.
This takes two minutes of pinning and makes a real difference. An unblocked maple leaf tends to bunch, and the points curl in on each other.
Adding veins (optional)
Thread a slightly darker shade onto your tapestry needle and work a line of backstitch from the centre out along each point, stopping just short of the tip. Five veins radiating from the middle is exactly what a real maple leaf looks like.
Why the points work
Each point is built from the tip inward. The slip stitch at the tip is nearly flat, so it makes a sharp point. The stitches get taller as they get closer to the centre — sc, hdc, dc, tr — so the point widens as it goes.
Longer chains make longer points. That’s the only difference between the long and short points in this pattern, and it’s how you can adjust the shape freely.
Troubleshooting your crochet maple leaf
The points are uneven. Count the chains on each point. All three long points need 8 chains; both short points need 6.
I ran out of centre stitches. The centre must have exactly 10 stitches. Each point uses 2.
The leaf is curling. Block it — dampen it and pin every point flat.
The points are rounded, not sharp. Make sure the first stitch back down each chain is a slip stitch.
It looks like a star, not a maple leaf. The long and short points are too similar. Make the long points longer — try 9 or 10 chains.
There’s a hole in the middle. The magic ring wasn’t pulled fully closed. Tighten it, or close it from the back with the tail.
Variations
- Serrated edges: work a round of sl st all the way around the finished leaf, with a ch-1 picot at the tip of each point.
- Ombré leaf: work the centre in gold and the points in red for a leaf that looks like it’s turning.
- A giant maple leaf: use chunky yarn and a 6.0mm hook with the same pattern for a table decoration or wall hanging.
- A leaf garland: make ten or twelve in mixed reds, oranges and golds.
- Bookmarks: add a long chain and tassel to the stem, like a crochet bookmark.
Maple leaves pair naturally with acorns and simple leaves in an autumn bowl.
Frequently asked questions
How do you crochet a maple leaf?
Work 10 single crochets into a magic ring, then make five points around it — three long points from chains of 8 and two short points from chains of 6 — each worked back down with stitches of increasing height.
What makes a crochet maple leaf different from a star?
The three upper points are longer than the two lower points. That difference in length is what makes it read as a maple leaf.
How long does it take to crochet a maple leaf?
About twenty minutes, plus drying time if you block it.
What colours are best for crochet maple leaves?
Deep red, scarlet, burnt orange and gold. Mixing several shades makes a striking set.
How do I stop my crochet maple leaf from curling?
Block it. Dampen the leaf, pin each point flat and spread, and let it dry completely.
Do I need treble crochet for this pattern?
Yes, at the base of each point. It’s double crochet with one extra yarn over at the start and one extra “pull through two” at the end.




