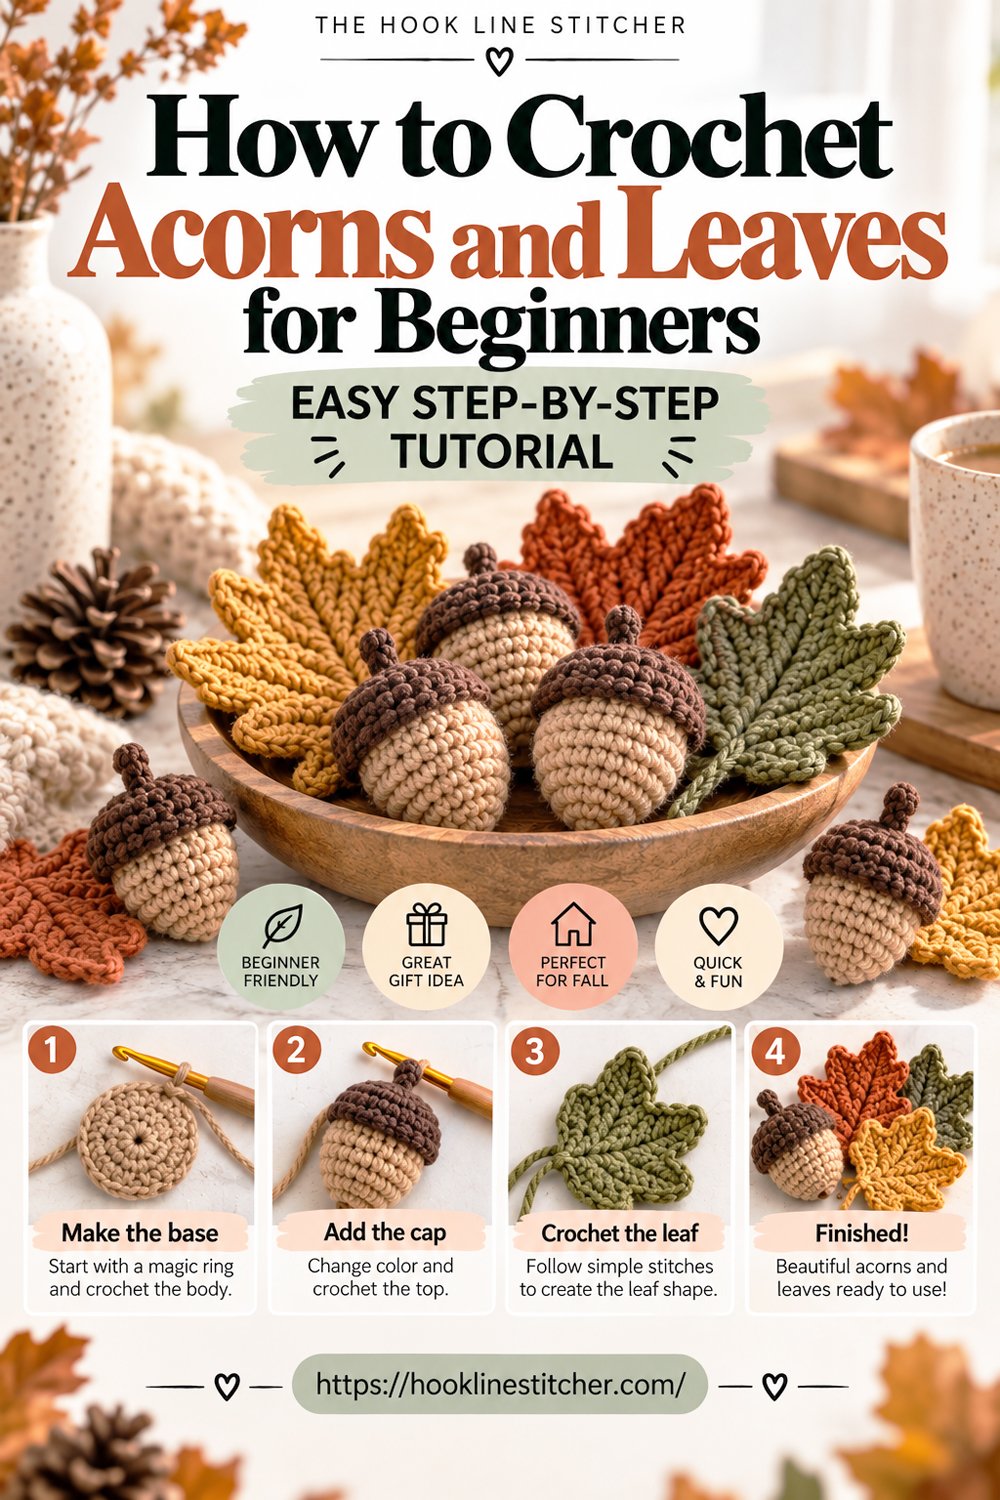
These are the two most useful autumn objects a beginner can make, and between them they take about forty minutes. This guide covers how to crochet acorns and leaves together, since they are made for each other.
They’re on the same page because they’re made for each other. A bowl of acorns on their own looks slightly odd. A pile of leaves on their own looks like an unfinished project. Together, with a few of each in mixed colours, they look like someone decorated on purpose.
They’re also two genuinely different lessons. The acorn teaches you the small stuffed shape — the basis of all amigurumi. The leaf teaches you how stitch height creates shape, which is one of the most useful ideas in crochet and one almost nobody explains.

From the shop · New pattern
A sweet cat-ear coaster in just 5 rounds. Beginner friendly, printable 7-page PDF for $4.99.
See the pattern →What you need
Worsted weight (4) or DK (3) yarn in cream or tan for the acorn nut, brown for the cap, and two or three autumn shades for the leaves. Scraps are ideal — each piece uses under ten metres.
A hook one size below the label — 4.0mm for worsted, 3.5mm for DK. Small stuffed shapes need tight fabric.
A little stuffing, a tapestry needle, and a stitch marker for the acorn.
From the shop · New pattern
A sweet cat-ear coaster in just 5 rounds. Beginner friendly, printable 7-page PDF for $4.99.
See the pattern →Cathrinee’s Supply Kit
Everything you need for this project
Terms
US crochet terms throughout.
- MR = magic ring · ch = chain · sl st = slip stitch
- sc = single crochet (UK double crochet)
- hdc = half double crochet (UK half treble)
- dc = double crochet (UK treble)
- inc = 2 sc into the same stitch · dec = decrease
- BLO = back loop only
How to crochet acorns
Two pieces — a rounded nut and a textured cap that sits over it. Twenty minutes.
The nut
In cream or tan. Worked in a continuous spiral, so keep a marker in the first stitch of each round.
- R1: 6 sc in MR — (6)
- R2: inc in each st — (12)
- R3: (sc, inc) x6 — (18)
- R4–R8: sc in each st around, five rounds — (18)
- R9: (sc, dec) x6 — (12)
Stuff firmly now, before the opening closes.
- R10: dec x6 — (6)
Fasten off with a tail. Run it through the front loop of each remaining stitch and pull tight to close.
The cap
In brown.
- R1: 6 sc in MR — (6)
- R2: inc in each st — (12)
- R3: (sc, inc) x6 — (18)
- R4: sc BLO in each st around — (18)
- R5: sc in each st around — (18)
That back loop round is what gives the cap its rim, so it sits over the nut like a lid rather than curving smoothly into it. It’s a small detail and it’s most of what makes the acorn read as an acorn.
The stem
Don’t fasten off. Ch 5, then sl st into the 2nd chain from the hook and into each remaining chain back down to the cap. Sl st into the cap and fasten off.
Working back down the chain doubles it, so the stem holds its shape instead of flopping.
Assembly
Place the cap over the top of the nut. It should sit just over the widest part. Sew around the rim with a few small stitches, catching both pieces.
Weave the ends inside and snip.
Acorn variations
- Textured cap. Work round 5 as sl st, sc alternating for a bobbled surface closer to a real acorn cap.
- A bigger acorn. Add a round 4 increase — (2 sc, inc) x6 for 24 — and work the cap to 24 as well.
- Colour. Cream nuts with dark brown caps look most realistic. Mustard, rust and pale sage nuts look more decorative and group better with leaves.
Part 2: The leaf
Worked along both sides of a short foundation chain, using four different stitch heights. Fifteen minutes and it’s completely flat, so no stuffing and no assembly.
How the shape works
This is the interesting part, and it’s a principle worth understanding rather than just following.
The leaf gets its shape entirely from stitch height. Short stitches at the base and tip, tall stitches in the middle. Because taller stitches reach further from the foundation chain, the outline bulges where they are and pulls in where the short ones are.
That’s the same idea behind crochet hearts, stars, flowers and petals. Once you see it, you can shape almost anything flat without any increasing or decreasing at all.
The pattern
Ch 10.
Working along the chain:
sl st in the 2nd ch from hook, sc in the next ch, hdc in the next 2 ch, dc in the next 2 ch, hdc in the next ch, sc in the next ch, then 3 sc in the last ch.
Those 3 sc turn the corner at the tip of the leaf.
Now working back along the opposite side of the same foundation chain:
sc in the next, hdc in the next, dc in the next 2, hdc in the next 2, sc in the next, sl st in the last.
Fasten off, leaving a tail of about 15 cm.
The stem
Use that tail. Ch 6, then sl st back down each chain and into the base of the leaf. Fasten off and weave in.
Same doubling trick as the acorn stem — a single chain stem droops, a doubled one holds.
Leaf variations
- A bigger leaf. Start with ch 14 and add more dc in the middle section. Keep the sequence symmetrical.
- A pointed maple-ish leaf. Work 1 sc, ch 2, 1 sc at the tip instead of 3 sc, which sharpens the point.
- Veins. Embroider a line of chain stitch or backstitch down the centre in a darker shade. Two minutes and it changes the object completely.
- Skeleton edging. Work a round of sl st all the way around the finished leaf in a contrasting colour for a defined outline.
Troubleshooting
My acorn cap doesn’t sit over the nut properly. Both pieces need to end on 18 stitches. If the cap is smaller, it’ll perch rather than cover.
The acorn is lumpy. Under-stuffed, or the stuffing is bunched in one place. Push it out toward the edges before closing.
I can see stuffing through the acorn. Hook too large. Go down a size — this can’t be fixed after the piece is closed.
My leaf is curling. Some curl is normal. Press it flat under a book overnight, or dampen it and let it dry flat.
The leaf isn’t symmetrical. The two sides need the same stitch sequence mirrored. Count the stitches on each side of the tip — they should match.
The stems flop. You chained but didn’t slip stitch back down. A single chain has no structure.
My leaf tip is rounded, not pointed. Three sc at the tip gives a soft point. Use sc, ch 2, sc for a sharper one.
Making a set
The whole point of these is quantity. One acorn is a curiosity; twelve in a bowl is decorating.
A good group: nine acorns in two or three colours, and twelve leaves in three colours, mixed together in a shallow bowl or scattered along a table.
For a garland, chain 10 between each piece and join as you go.
Both are excellent television projects — small, repetitive, and they don’t need you to look at them constantly once the first one is done.
What’s next
These sit beautifully alongside a group of crochet pumpkins in the same palette.
More seasonal ideas: Easy Crochet Projects for Fall →
Frequently asked questions
How do you crochet a leaf?
Work along both sides of a short foundation chain using stitches of increasing then decreasing height — slip stitch and single crochet at the ends, double crochet in the middle. The height difference creates the shape.
How long does it take to crochet an acorn?
About twenty minutes for both pieces plus assembly. A leaf takes around fifteen.
What yarn should I use for crochet acorns and leaves?
Worsted or DK in cream and brown for acorns, autumn shades for leaves. Both use under ten metres each, so scraps are ideal.
Why doesn’t my crochet acorn cap fit?
The nut and cap must both end on the same stitch count — 18 in this pattern. Check both.
Do crochet leaves need blocking?
Not strictly, but pressing them flat under a book overnight gives a much neater result and takes no effort.
How many should I make?
For a bowl, around nine acorns and twelve leaves in mixed colours. Small autumn objects work as a group rather than individually.
Can beginners make these?
Yes. The leaf needs no shaping at all, and the acorn is the simplest possible stuffed shape.
How do you crochet an acorn?
Work a small ball in cream or tan for the nut, then a cap in brown starting as a flat circle and worked straight for two rounds so it fits over the top. Add a short chain stem. The cap sits over the nut like a lid.
How do you crochet a leaf?
Chain the length of the leaf, then work back along both sides of the chain using increasing and decreasing stitch heights — slip stitch, single, half double, double, then back down — which creates the pointed leaf shape naturally.
What yarn should I use for crochet leaves and acorns?
Worsted weight in autumn colours — rust, mustard, burnt orange, brown and cream. Cotton holds a crisper leaf shape than acrylic and blocks flat, which matters if you want defined points.
How do I make crochet leaves lie flat?
Block them. Dampen each leaf, pin it flat into shape and let it dry completely. Cotton will hold the shape permanently. For acrylic, press under a heavy book for an hour.
What can I make with crochet acorns and leaves?
Garlands, table scatter, wreath decorations, napkin rings, or appliqués sewn onto cushions and bags. They take under twenty minutes each, so a set of a dozen is one comfortable evening.





2 Comments on “How to Crochet Acorns and Leaves for Beginners: Easy Step-by-Step Tutorial”