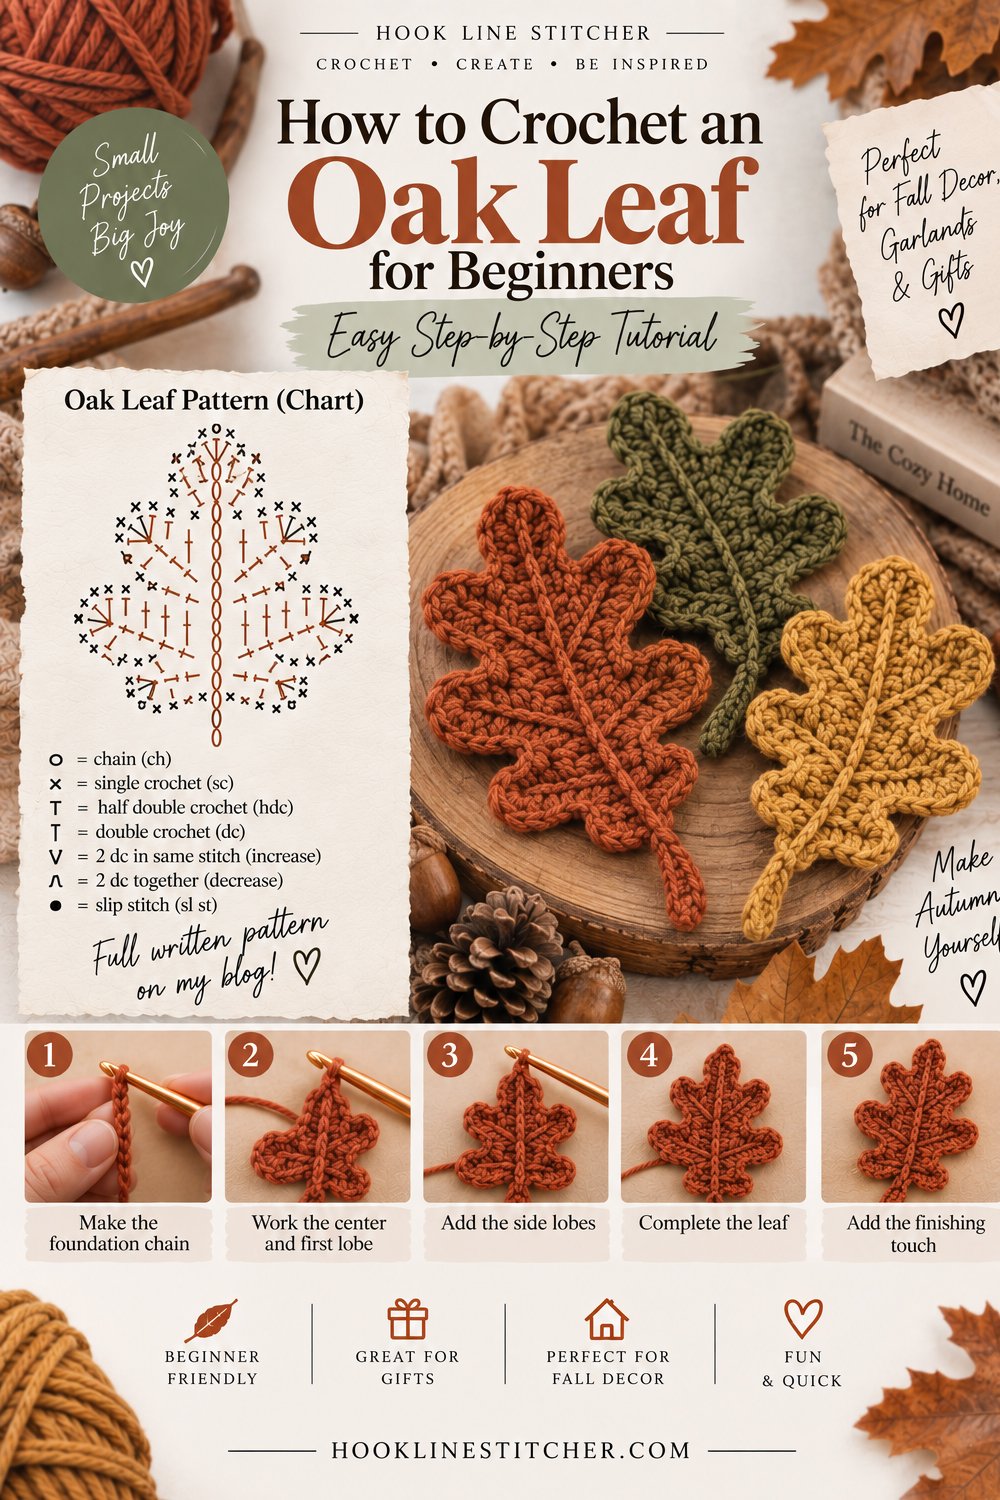
Learning how to crochet an oak leaf is a small step up from a basic crochet leaf, and the difference is entirely in the edge.
A simple leaf has a smooth outline. An oak leaf has rounded lobes — the wavy, scalloped edge that makes it instantly recognisable. You create those lobes with a second round worked around a plain base leaf, alternating short stitches with small clusters of taller ones. The short stitches pull the edge in; the tall clusters push it out.
It’s the same principle behind crochet shells and scallops, used to make something natural.
About twenty minutes. Finished leaf roughly 9 cm long.
What you need to know first
- Chain stitch
- Slip stitch
- Single crochet
- Half double crochet and double crochet
- Working along both sides of a foundation chain
That last one is the only thing that might be new, and it’s simple: after you reach the end of the chain, you turn the work and continue along the other side of the same chain, using the loops you didn’t work into the first time.
What you need
Worsted weight (4) yarn in an autumn colour. Oak leaves turn rich russet, warm brown, deep gold and olive — rust and burnt orange also look wonderful.
A 4.0mm hook.
A tapestry needle and scissors.
About 8 metres per leaf.
Cathrinee’s Supply Kit
The beginner basics I recommend
Crochet terms used
US crochet terms.
- ch = chain · sl st = slip stitch
- sc = single crochet (UK double crochet)
- hdc = half double crochet (UK half treble)
- dc = double crochet (UK treble)
- st(s) = stitch(es)
Step 1: Crochet the base leaf
This round works along both sides of a foundation chain to make a narrow oval.
Ch 10.
Along the first side of the chain: sc into the 2nd ch from the hook, then sc into each of the next 7 ch — 8 sc. Work 3 sc into the last chain. This turns the corner at the tip.
Rotate the work so you’re looking at the other side of the foundation chain.
Along the second side: sc into each of the next 7 chains — 7 sc. Then work 2 sc into the last chain, which is the same chain your very first sc went into.
Join with a sl st into your first sc.
Count: 8 + 3 + 7 + 2 = 20 stitches around a narrow oval. That number matters, because the lobes in the next round depend on it.
Step 2: Crochet the lobes
This is the round that turns the oval into an oak leaf. Each lobe uses 4 stitches of the base, so 20 stitches gives you 5 lobes.
Ch 1. Then for each lobe:
- sc into the next stitch
- (hdc, dc, hdc) all into the next stitch — this is the rounded bump of the lobe
- sc into the next stitch
- sl st into the next stitch — this is the dip between lobes
Repeat 4 more times, working all the way around.
Join with a sl st into the first stitch. Don’t fasten off yet — the stem comes next.
Step 3: Crochet the stem
From where you are, at the base of the leaf:
Ch 6, then sl st into the 2nd ch from the hook and into each chain back down to the leaf. Sl st into the leaf and fasten off.
Slip stitching back down the chain doubles it, so the stem holds its shape and doesn’t flop. Weave in the ends.
Step 4: Add a vein (optional)
A single central vein makes the leaf much more convincing.
Thread a slightly darker shade onto your tapestry needle and work a line of backstitch or chain stitch down the middle of the leaf, from the stem toward the tip. Two or three small side veins branching off are a nice extra.
Keep the stitches small and slightly uneven. A perfectly straight line looks drawn on.
Why the lobes work
It’s worth understanding this, because it lets you adjust the pattern freely.
A slip stitch is nearly flat, so it pulls the edge inward. An (hdc, dc, hdc) cluster is tall and wide, so it pushes the edge outward. Alternating them creates a wave.
Want deeper lobes? Use (hdc, dc, dc, hdc) in the cluster stitch. Want shallower ones? Use (sc, hdc, sc). Want more lobes? Make the base chain longer so there are more stitches around the oval — just keep the total a multiple of 4.
Troubleshooting your crochet oak leaf
The lobes are uneven. The base leaf doesn’t have exactly 20 stitches. Count before working the lobe round — how to count crochet stitches helps if you’re unsure what counts.
The leaf is curling. Common with small flat pieces. Press it under a book overnight, or dampen and pin it flat to dry.
The lobes aren’t distinct. Make the clusters taller — add a second dc — or make sure the dip between lobes is a slip stitch rather than a single crochet.
The tip is blunt. Work 3 sc in the tip chain on the base round, not 2.
The stem flops. You chained but didn’t slip stitch back down. A single chain has no structure.
My leaf is lopsided. One side of the base got an extra stitch. Both sides should have matching counts.
Variations
- A larger oak leaf: ch 14 for the base, and adjust so the total around is 28 stitches — that gives 7 lobes.
- Two-tone: work the base in one colour and the lobe round in another. Rust base with a gold edge looks especially good.
- Garland: make 12 in mixed autumn colours and chain between them.
- With acorns: oak leaves and acorns together make a natural autumn display.
- Coasters: make a large version in cotton for a leaf-shaped coaster.
Frequently asked questions
How do you crochet an oak leaf?
Make a narrow oval by working single crochet along both sides of a foundation chain, then add a round of lobes — alternating single crochet, a cluster of taller stitches, and a slip stitch — to create the wavy edge.
How is an oak leaf different from a basic crochet leaf?
A basic leaf has a smooth outline. An oak leaf adds a second round with clusters of taller stitches that create the rounded lobes.
How long does it take to crochet an oak leaf?
About twenty minutes.
How do I make the lobes deeper?
Add an extra double crochet to each cluster, and keep the dip between lobes as a slip stitch.
What colours are best for crochet oak leaves?
Russet, warm brown, deep gold, olive, rust and burnt orange.
Why is my crochet oak leaf curling?
Small flat pieces often curl. Press it flat under a book overnight, or block it by dampening and pinning it flat.




