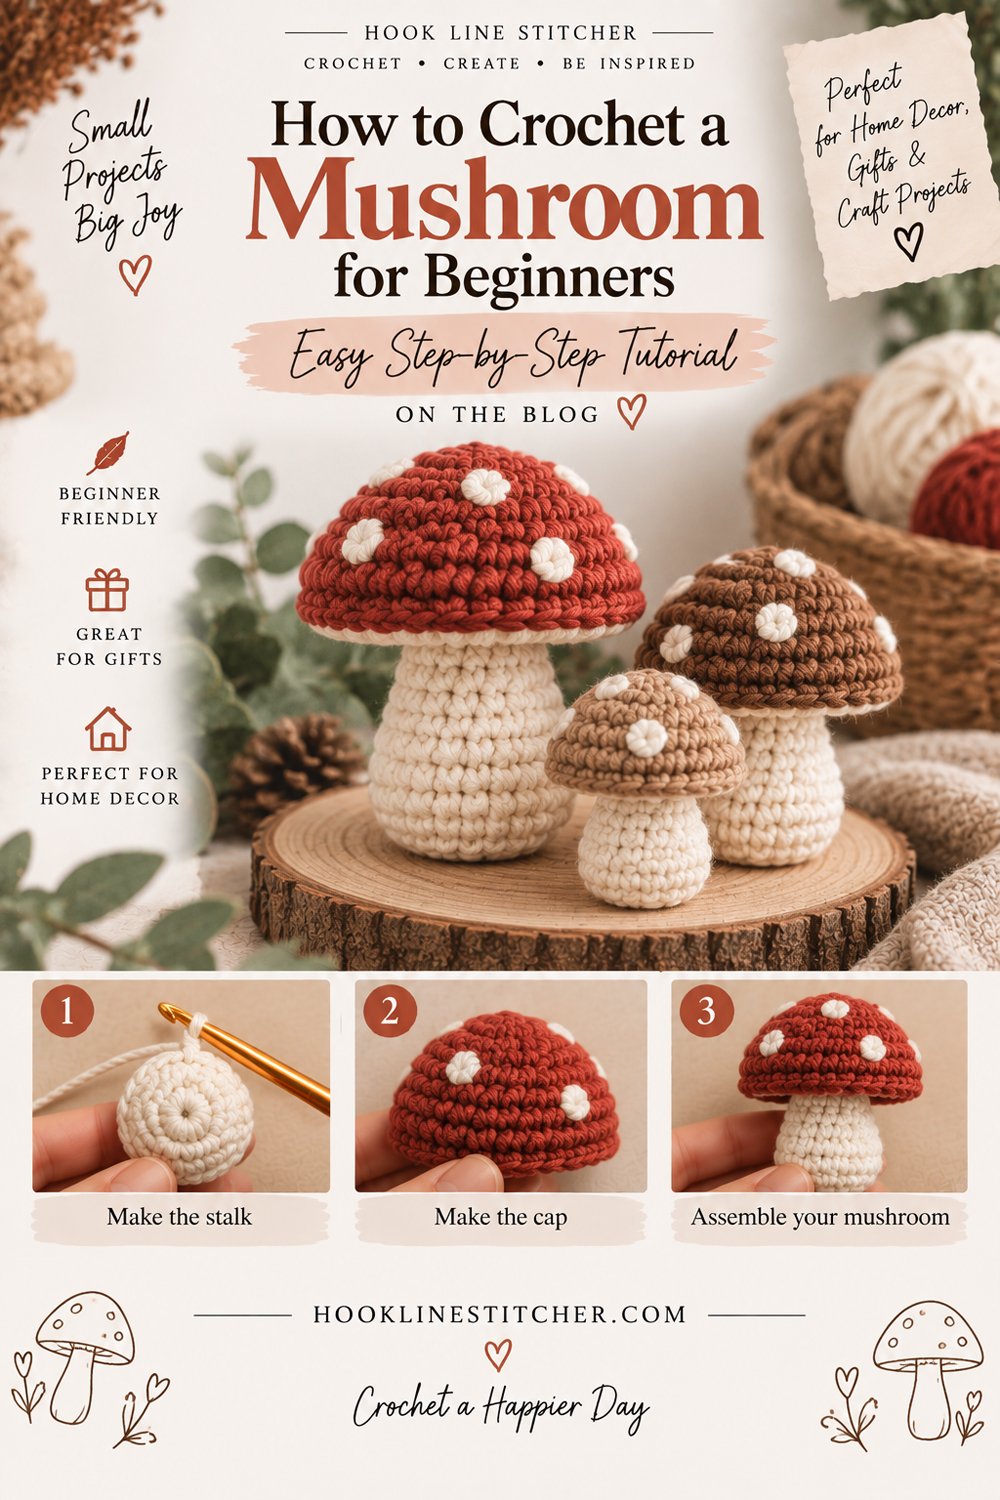
Learning how to crochet a mushroom is one of the best introductions to amigurumi, because a mushroom teaches you the two shapes almost every stuffed crochet object is built from: a dome and a cylinder.
The cap is a dome — increase out, work straight, then turn a sharp edge. The stem is a cylinder — a flat base and straight sides. Put them together and you have a mushroom. Understand those two shapes and you understand most of amigurumi.
Mushrooms are also forgiving. Real mushrooms are lumpy, lopsided and irregular, so a slightly uneven crochet mushroom looks natural rather than wrong. That’s a genuinely useful quality in a first stuffed project.
About an hour for a medium mushroom. Finished size around 9 cm tall.

From the shop · New pattern
A sweet cat-ear coaster in just 5 rounds. Beginner friendly, printable 7-page PDF for $4.99.
See the pattern →What you need to know first
- Single crochet
- The magic ring
- Working in a continuous spiral
- Increasing and decreasing
- Back loop only — used twice, to create sharp edges
What you need
Worsted weight (4) yarn in two colours: one for the cap and one for the stem. Cream is the classic stem colour. For the cap, rust, deep red, mustard, soft brown or sage all look good — muted shades read as woodland decor, while bright red with white spots reads as a toadstool from a storybook. Both are lovely; they just suit different rooms.
A small amount of contrasting yarn for the spots, if you want them.
A 3.5mm hook — one or two sizes below what worsted usually calls for, so stuffing doesn’t show through.
Polyester stuffing, a stitch marker, and a tapestry needle.
About 30 metres in total.
From the shop · New pattern
A sweet cat-ear coaster in just 5 rounds. Beginner friendly, printable 7-page PDF for $4.99.
See the pattern →Cathrinee’s Supply Kit
Everything you need for this project
Crochet terms used
This pattern uses US crochet terms.
- MR = magic ring
- sc = single crochet (UK double crochet)
- inc = 2 sc into the same stitch
- dec = decrease — 2 stitches worked together
- BLO = back loop only
- ( ) x6 = repeat what’s in the brackets six times
Use the invisible decrease: insert your hook into the front loop only of the next stitch, then the front loop only of the one after, yarn over and pull through two loops, then yarn over and pull through the remaining two. It blends into the fabric, where a standard decrease leaves a small bump.
How the shape works
It helps to understand this before you start, because it explains every round.
The cap starts as a flat circle. You increase until it’s the width you want, then stop increasing so the fabric turns downward into a dome. One round worked in the back loop only creates a crisp rim — the edge where the top of the cap meets the underside. Then you decrease inward to form the underside, leaving an opening for the stem.
The stem starts as a small flat circle. One back loop round makes it turn a sharp corner upward, so the stem has a flat base and stands on its own. Then it’s straight rounds with no shaping at all.
Step 1: Crochet the mushroom cap
In your cap colour. Place a stitch marker in the first stitch of each round and move it up as you go — how to count crochet stitches explains why this matters in a spiral.
- R1: 6 sc in MR — (6)
- R2: inc in each st — (12)
- R3: (sc, inc) x6 — (18)
- R4: (2 sc, inc) x6 — (24)
- R5: (3 sc, inc) x6 — (30)
- R6–R8: sc in each st around, three rounds — (30)
The fabric will start curving downward during these rounds. That’s the dome forming.
- R9: sc BLO in each st around — (30)
This is the rim. You’ll feel the fabric want to fold along this round.
- R10: (3 sc, dec) x6 — (24)
- R11: (2 sc, dec) x6 — (18)
Stuff the cap lightly — enough to hold the dome shape, not so much that it bulges. Fasten off, leaving a 30 cm tail for sewing.
The opening that remains, 18 stitches around, is where the stem goes.
Step 2: Crochet the mushroom stem
In your stem colour.
- R1: 6 sc in MR — (6)
- R2: inc in each st — (12)
- R3: sc BLO in each st around — (12)
That back loop round makes the flat base turn upward, so the stem stands up.
- R4–R9: sc in each st around, six rounds — (12)
Stuff the stem firmly. It’s the part holding the whole mushroom up, and a soft stem makes the cap droop.
Fasten off, leaving a short tail and weaving it inside.
Step 3: Assemble the mushroom
Push the open top of the stem up into the opening under the cap. The stem is 12 stitches around and the opening is 18, so it should sit snugly with a little room.
Using the cap’s long tail, sew around where the cap meets the stem, catching a stitch from each. Go all the way round, then go round a second time for strength.
Add a little extra stuffing into the cap through any gap before you finish if the dome looks flat.
Placement tip: set the stem very slightly off-centre, or tilt the cap a few degrees. A perfectly straight, centred mushroom looks manufactured. A small tilt looks like it grew.
Step 4: Add the spots (optional)
Two options, depending on how much time you want to spend.
Embroidered spots — the quick way. Thread contrasting yarn onto your needle and make small clusters of stitches, or French knots, scattered across the cap. Five to seven spots of varying sizes looks natural.
Crocheted spots — the neater way. For each spot: 5 sc into a magic ring, pull tight, slip stitch to join, and fasten off with a tail. Sew each one flat onto the cap. Vary the size by making some with 6 sc instead of 5.
Keep the spots uneven in size and spacing. Evenly spaced identical spots look like polka dots rather than a mushroom.
Three size options
Tiny mushroom (about 5 cm) — stop the cap increases at R3 (18 stitches), work two straight rounds, the BLO round, then one decrease round to 12. Make the stem with a 9-stitch base by working (2 sc, inc) x3 in R2 instead. Lovely in groups of three.
Medium mushroom (about 9 cm) — the pattern as written.
Large mushroom (about 13 cm) — add R6 as (4 sc, inc) x6 for 36 stitches, work four straight rounds, the BLO round, then decrease back to 18. Lengthen the stem by three rounds.
A group of three sizes together looks far more deliberate than one mushroom on its own.
Troubleshooting your crochet mushroom
The cap is flat, not domed. You kept increasing too long, or stopped the straight rounds too early. The dome only forms once the increases stop.
The cap is a tall bell shape. Too many straight rounds before the rim. Remove one or two of R6–R8.
The mushroom won’t stand up. The stem is under-stuffed, or the base BLO round was missed. The base needs to be flat and the stem firm.
The cap droops to one side. The stem is too soft, or it’s sewn in off-centre by more than a few degrees. Add stuffing to the stem.
Stuffing shows through the fabric. Your hook is too large. Go down a size — this can’t be fixed after the piece is finished, so check your first three rounds by holding them up to a light. More on this in amigurumi problems and fixes.
There’s a gap between the cap and stem. Sew around a second time, catching slightly more of each piece.
Variations
- Toadstool style: bright red cap, white spots, cream stem.
- Woodland style: rust, mustard or brown cap with no spots, cream or oatmeal stem.
- Two-tone underside: work R10 and R11 in cream so the underside of the cap looks like gills.
- A mushroom cluster: make three sizes and sew their stems together at the base.
- Keychain: make the tiny size in cotton and add a split ring through the top of the cap.
- Ornament: add a hanging loop to the top of the cap — chain 12, then slip stitch back down every chain.
Mushrooms sit beautifully beside crochet acorns and leaves and a small group of pumpkins.
Frequently asked questions
How do you crochet a mushroom for beginners?
Make a domed cap by increasing from a magic ring, then working straight rounds and a back loop only round for the rim. Make a cylinder for the stem with a flat base. Stuff both and sew the stem into the underside of the cap.
How long does it take to crochet a mushroom?
About an hour for the medium size, including assembly and spots.
What yarn is best for a crochet mushroom?
Worsted weight acrylic or cotton. Cotton gives crisper edges; acrylic is softer and easier to work.
Why won’t my crochet mushroom stand up?
The stem is under-stuffed or doesn’t have a flat base. Stuff the stem firmly and make sure the back loop only round in the base is worked.
How do I make my crochet mushroom cap more domed?
Stop increasing earlier and work more straight rounds before the rim. The dome forms once the increases stop.
Can beginners crochet a mushroom?
Yes. It uses only single crochet, and the natural irregularity of mushrooms forgives small mistakes.
Are crochet mushrooms safe for babies?
Embroider rather than glue any details, sew everything securely, and avoid small separate pieces for children under three.