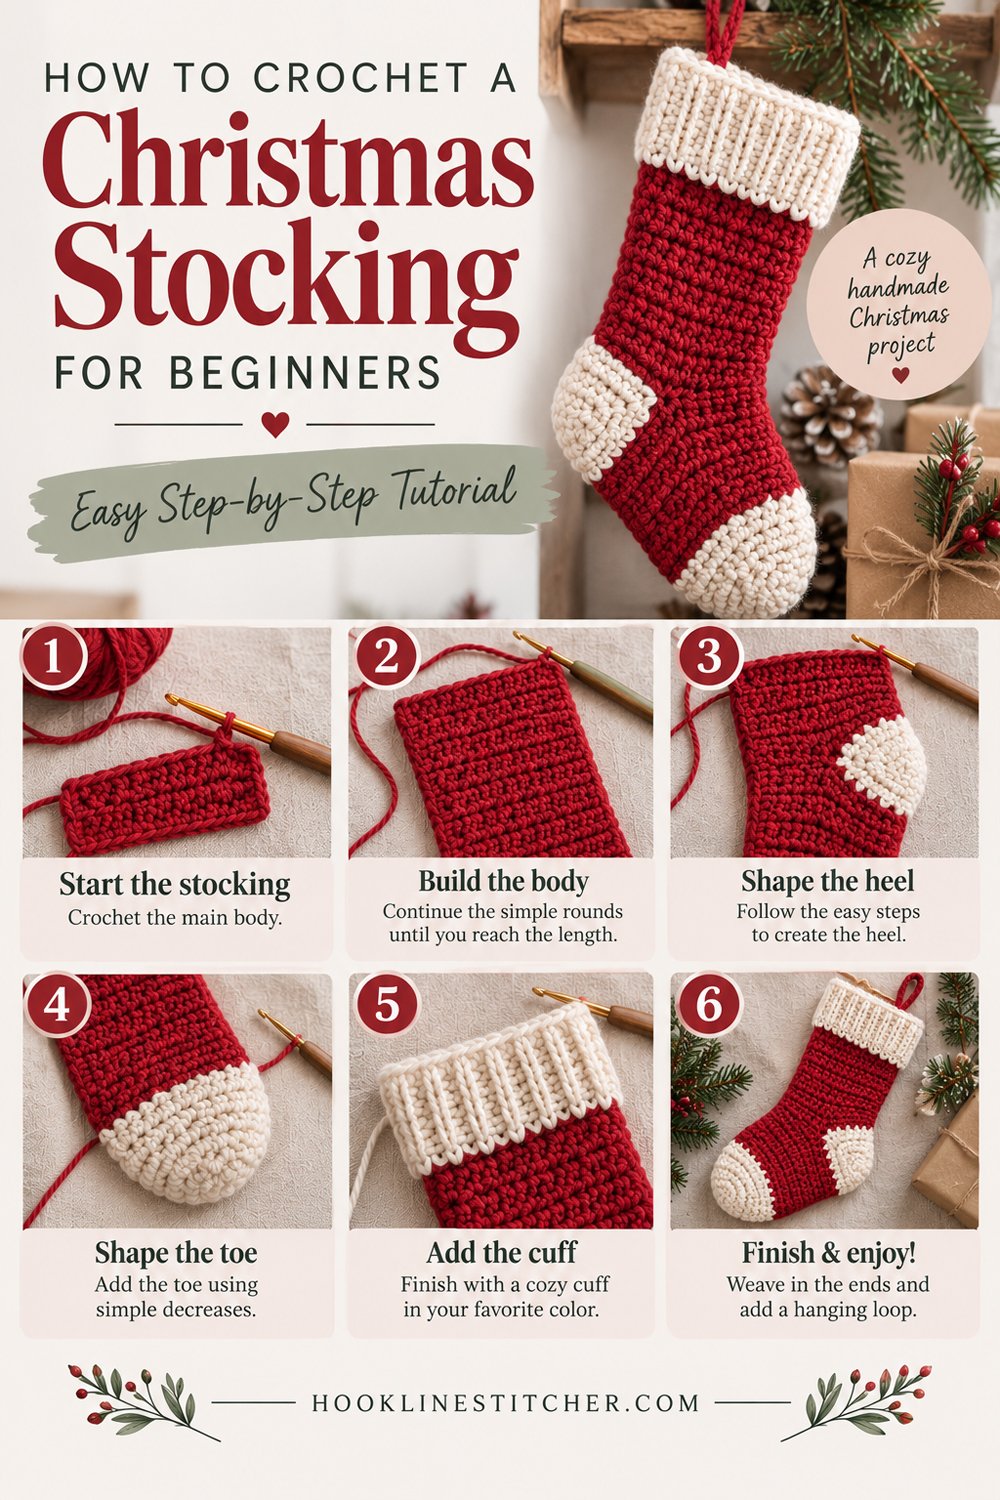
Most crochet stocking patterns are not beginner patterns, whatever they’re labelled. Below is how to crochet a Christmas stocking from two flat pieces, with no heel shaping anywhere in it.
They’re worked in the round with a shaped heel, and heel shaping is genuinely intermediate work — short rows, picked-up stitches, and a construction that’s hard to picture until you’ve done it twice. Beginners who attempt one usually end up with something that doesn’t sit right and can’t work out why.
This version avoids all of it. Two flat pieces, joined around the edge. The stocking shape is built into each piece as you go, and the only “assembly” is single crocheting around the outside — the same technique used to join a pot holder.
Mini size takes about ninety minutes. Full size takes three to four hours.

From the shop · New pattern
A sweet cat-ear coaster in just 5 rounds. Beginner friendly, printable 7-page PDF for $4.99.
See the pattern →What you need to know first
- Chain stitch
- Single crochet
- Decreasing
- Turning at the end of a row
- Joining two pieces with single crochet
What you need
Worsted weight (4) yarn in your main colour, plus a contrasting colour for the cuff. Acrylic or a wool blend is ideal — a stocking should look soft rather than crisp, so cotton is the weaker choice here.
Colour note: cream with a deep red cuff, or forest green with cream, looks considerably more grown-up than red-and-white stripes. Both are recognisably Christmas.
A 5.0mm hook.
A tapestry needle and scissors.
About 80 metres for a mini stocking, 250 for a full-size one.
From the shop · New pattern
A sweet cat-ear coaster in just 5 rounds. Beginner friendly, printable 7-page PDF for $4.99.
See the pattern →Cathrinee’s Supply Kit
Everything you need for this project
Terms
US crochet terms.
- ch = chain · sc = single crochet (UK double crochet) · sl st = slip stitch · dec = decrease · st(s) = stitch(es)
How the shape is built
Each piece is an L shape, and it’s made in one go without any sewing.
You work the leg first as a plain rectangle. Then, on one row, you chain extra stitches at the start before turning — those chains extend the piece sideways, forming the foot. Every row after that is worked across the full new width.
That’s the whole trick. Adding chains at the beginning of a row is how crochet grows sideways, and it’s worth knowing well beyond this project.
How to crochet a Christmas stocking: the mini size
Finished stocking about 18 cm tall. Make two identical pieces.
The leg
Ch 15.
- Row 1: sc in the 2nd ch from hook and in each ch across — (14)
- Rows 2–9: ch 1, turn, sc in each st across — (14)
The foot
- Row 10: ch 9, turn. Sc in the 2nd ch from hook and in each of the next 7 ch — that’s 8 sc. Then sc in each of the 14 stitches of the leg — (22)
The piece is now L-shaped: the leg above, and the foot extending out to one side.
- Rows 11–14: ch 1, turn, sc in each st across — (22)
The toe
- Row 15: ch 1, turn, dec, sc in next 18, dec — (20)
- Row 16: ch 1, turn, dec, sc in next 16, dec — (18)
Fasten off.
Make a second piece exactly the same. Count the rows on the first and match them — two pieces of different sizes won’t join cleanly.
Important: the second piece will be a mirror image when you flip it over, which is correct. That’s what makes the foot point the same way on both sides once they’re held together.
Joining
Hold both pieces together with the wrong sides facing each other, so the good sides face out. Line up the edges.
Working through both layers at once, single crochet around the whole stocking — up the back of the leg, around the foot, around the toe, and back up the front of the leg.
Leave the top edge open. That’s the opening.
- One sc into the end of each row along the sides
- One sc into each stitch along the bottom
- 3 sc into the toe corner and each bottom corner, so they turn sharply
Fasten off and weave in the ends.
The cuff
Join your contrasting colour at the top edge, at the back seam.
Sc around the entire top opening, through both layers, and join with a sl st.
Then work 4 more rounds of sc, joining each round with a sl st and ch 1 to start the next.
Fasten off and weave in.
The hanging loop
Join your contrasting yarn at the back corner of the cuff.
Ch 12, then sl st into each chain back down to the cuff. Sl st into the cuff and fasten off.
Slip stitching back down doubles the loop so it holds its shape under the weight of whatever goes in the stocking.
Full size
Same construction, bigger numbers. Finished stocking about 40 cm tall.
- Leg: ch 31, work 30 sc across, then 20 rows
- Foot: row 21, ch 17, turn, sc in the 2nd ch from hook and next 15 ch (16 sc), then sc across the 30 leg stitches — (46)
- Rows 22–30: sc across — (46)
- Toe: decrease one stitch at each end of each row for 3 rows — (40)
- Cuff: 8 rounds instead of 4
Everything else is identical.
Troubleshooting
My two pieces don’t match. Count rows rather than measuring. Same chain, same rows, same hook.
The foot points the wrong way on one side. Flip one piece over before joining. They’re mirror images, which is correct.
The edges pucker when joining. Too many stitches along the sides. One sc per row end, not two.
The stocking won’t lie flat. Uneven tension between the two pieces. Block it — dampen, pin flat, let dry.
The corners are rounded. Three sc into each corner stitch.
The hanging loop stretches out. You chained but didn’t slip stitch back down.
The cuff flares out. Too many stitches in the first cuff round. Work one sc per stitch, no increases.
Variations
Striped. Change colour every four rows on the leg. Because the rows run horizontally, you get horizontal stripes.
A name. Embroider it onto the cuff with a tapestry needle and contrasting yarn, in backstitch. This is what turns a stocking into a keepsake.
Ribbed cuff. Work the cuff in back loops only for a ribbed texture that looks more like a knitted stocking.
Mini stockings as ornaments. Make the mini version at half scale — ch 9 for the leg, 5 rows — and hang them on the tree. A set of six in different colours is a good evening’s work.
Gift pouches. The mini stocking holds a chocolate orange, a small bottle, or a folded gift card. Better than wrapping paper and it gets kept.
Lined. For a full-size stocking that’ll be filled heavily, hand-stitch a fabric lining inside the leg. Ten minutes, and it stops the crochet stretching over years of use.
What’s next
More seasonal ideas: Easy Christmas Crochet Patterns for Beginners →
Frequently asked questions
How do you crochet a Christmas stocking without shaping a heel?
Work two flat L-shaped pieces and join them around the edge with single crochet. The shape comes from chaining extra stitches at the start of one row to extend the foot.
How big should a crochet Christmas stocking be?
Around 40 cm tall for a full-size one, 18 cm for a mini or ornament version.
What yarn is best for a crochet stocking?
Worsted weight acrylic or a wool blend. Cotton works but looks crisp rather than cosy.
How much yarn does a crochet stocking use?
About 250 metres for full size, 80 for a mini.
Can beginners crochet a Christmas stocking?
Yes, with this construction. The usual difficulty is heel shaping, which two flat joined pieces avoid entirely.
How do you add a name to a crochet stocking?
Embroider it onto the cuff with backstitch using a tapestry needle and contrasting yarn.
How long does it take to crochet a Christmas stocking?
Ninety minutes for the mini size, three to four hours for full size.
How do you crochet a Christmas stocking?
Work a flat oval sole, turn the sides up and build a tube for the foot, shape the heel with short rows, then continue straight up the leg and finish with a folded cuff in a contrasting colour. Add a chain loop at the top for hanging.
Is a crochet Christmas stocking hard for a beginner?
It is the most involved project in a Christmas set, but it is still only single crochet. The heel is the one shaped section, and on a decorative stocking it does not need to fit a real foot, so small irregularities do not matter.
What size should a crochet Christmas stocking be?
Decorative stockings are usually 14 to 18 inches from cuff to toe. Make it larger than a real sock — a stocking that looks generous hanging on a mantelpiece is much more appealing than an accurate one.
What yarn should I use for a Christmas stocking?
Worsted weight acrylic in red, green, cream or white. Acrylic is affordable in the quantity a stocking needs, holds its shape when hung, and survives being stored in a box for eleven months of the year.
Can I personalise a crochet stocking with a name?
Yes. Embroider the name onto the cuff with a yarn needle using back stitch or chain stitch after the stocking is finished. Working it into the crochet itself is far harder and rarely looks as neat.




