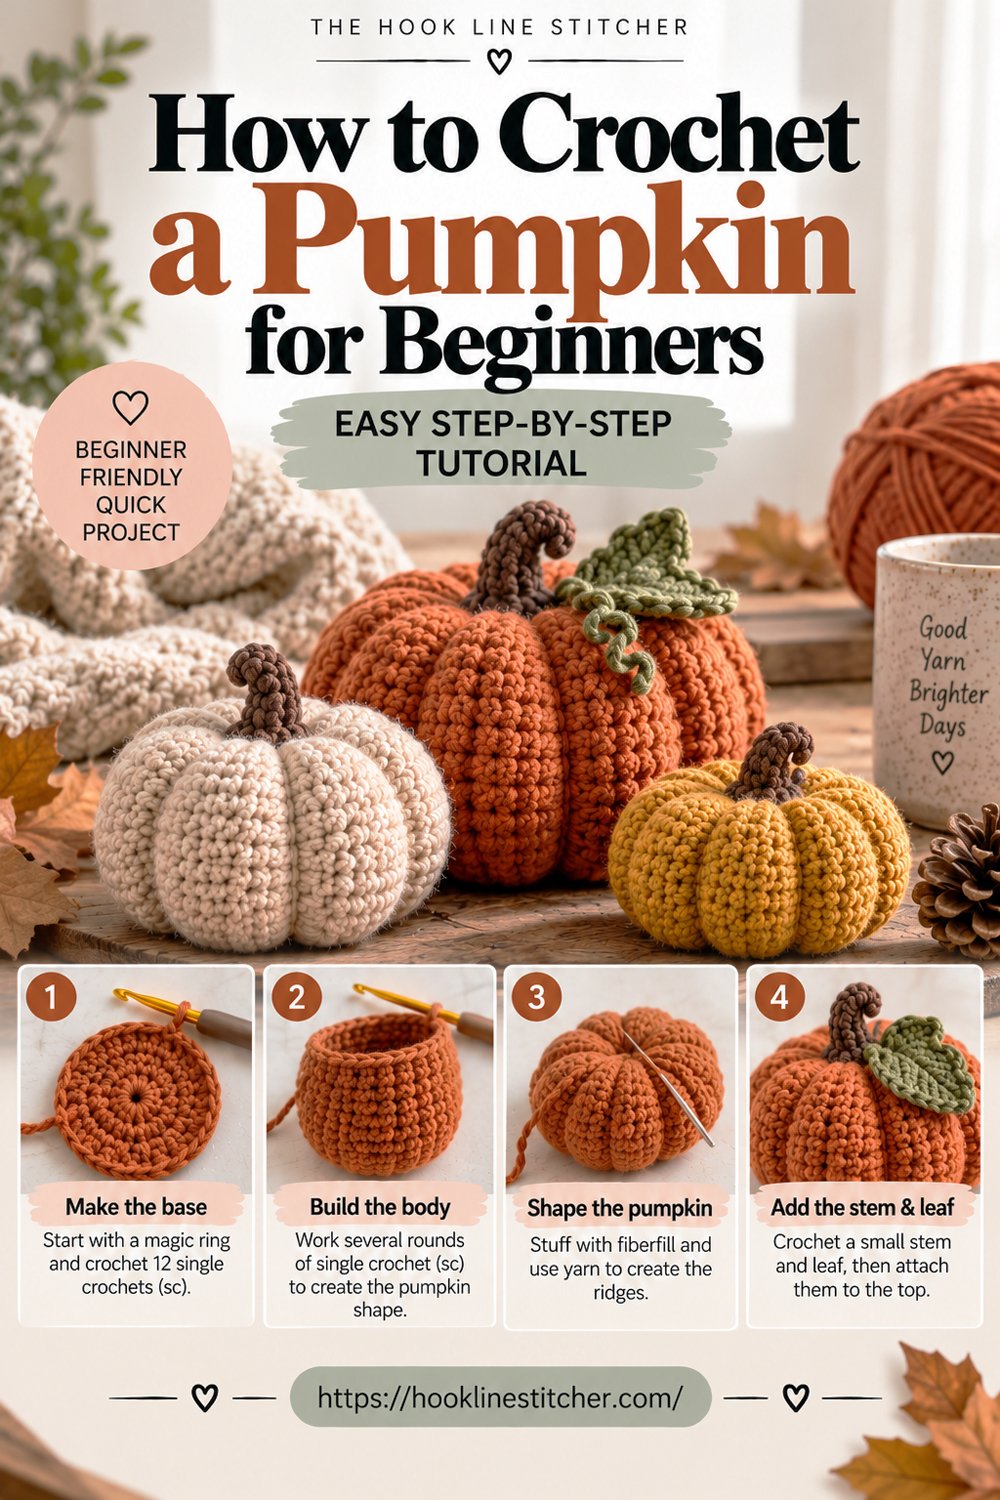
The best crochet pumpkin isn’t crocheted as a pumpkin at all. Below is how to crochet a pumpkin using that method, with the strip, the seam and the segments broken down.
It’s a flat rectangle. You work a strip of ribbed fabric, seam the long edges into a tube, gather both ends shut, stuff it, and then cinch it with yarn to create the segments. The pumpkin shape appears at the very end, in about ninety seconds of work with a needle.
That matters because the alternative — crocheting a sphere with increase and decrease rounds — is much fussier and produces a worse result. Spheres come out looking like balls with stems. The ribbed method gives you the vertical ridges that make a pumpkin read as a pumpkin.
About an hour. No shaping, no complicated counting, and the only skill you need beyond single crochet is working into the back loop.

From the shop · New pattern
A sweet cat-ear coaster in just 5 rounds. Beginner friendly, printable 7-page PDF for $4.99.
See the pattern →What you need to know first
- Chain stitch
- Single crochet
- Back loop only — instead of hooking under both loops at the top of a stitch, you hook under the back one only. That’s the entire technique, and it’s what creates the ribbing.
What you need
This post contains affiliate links. As an Amazon Associate I earn from qualifying purchases, at no extra cost to you. Full disclosure.
Worsted weight (4) yarn in an autumn colour, plus a small amount of brown or green for the stem. Wool or a soft acrylic works better than cotton here — a slight fuzziness makes the pumpkin look cosy rather than crisp.
Colour advice: a muted rust or dusty orange reads as autumn. A pure bright orange reads as Halloween. Cream, mustard and pale sage pumpkins look expensive and are worth making alongside the orange ones.
A tapestry needle and scissors.
About 60 metres for a medium pumpkin.
From the shop · New pattern
A sweet cat-ear coaster in just 5 rounds. Beginner friendly, printable 7-page PDF for $4.99.
See the pattern →Cathrinee’s Supply Kit
Everything you need for this project
Terms
US crochet terms.
- ch = chain
- sc = single crochet (UK double crochet)
- BLO = back loop only
- st(s) = stitch(es)
How to crochet a pumpkin, step by step
The ribbed strip
Ch 21.
Row 1: sc in the 2nd ch from hook and in each ch across — (20)
Row 2: ch 1, turn, sc BLO in each st across — (20)
Repeat row 2 for 30 rows total.
The strip should measure roughly 20 cm wide by 18 cm long. The ribs run across the short direction — those become the vertical ridges of the finished pumpkin.
Count every row. Twenty stitches, every time. The ch-1 at the start is height only and is never worked into.
For a different size: the initial chain controls the pumpkin’s height, and the number of rows controls how wide around it is. Ch 16 with 24 rows gives a small pumpkin; ch 26 with 38 rows gives a large one.
Fasten off, leaving a tail about 60 cm long. You’ll use it for everything that follows.
Seaming into a tube
Fold the strip so the two short ends meet, right sides together.
Thread the long tail on your needle and whip stitch across, passing through one stitch on each side and pulling snug. Work all the way along, then go back through the same stitches in the opposite direction for strength.
Turn it right side out. You should have a ribbed tube open at both ends.
Gathering the ends
Bottom: thread a length of yarn onto your needle and run a line of running stitch around one open end, about half a centimetre in from the edge. Pull tight so the opening closes like a drawstring. Knot it off securely and leave the tail inside.
Stuff it. Firmly — a soft pumpkin sags and looks deflated. Push stuffing out toward the edges so the shape is even rather than lumpy in the middle.
Top: repeat the running stitch around the other end and pull tight. Don’t cut this tail. It becomes the segmenting yarn.
The segments
This is the step that turns a stuffed tube into a pumpkin.
Take the long tail from the top. Push the needle down through the centre of the pumpkin and out at the centre of the bottom. Bring the yarn up the outside of the pumpkin, back to the top, and push the needle down through the centre again.
Pull firmly each time. The yarn sinks into the ribbing and pulls the pumpkin in at that line.
Repeat six or eight times, spacing the lines evenly around the pumpkin. Six segments looks natural; eight looks plumper.
Knot off at the top, where the stem will hide it.
The thing to get right: pull tighter than feels safe. Timid segmenting gives a round ball with faint lines on it. Firm segmenting gives an obviously ribbed pumpkin. The yarn is stronger than you think.
The stem
In brown or green:
- R1: 6 sc in a magic ring — (6)
- R2–R7: sc in each st around — (6)
Fasten off with a long tail. Stuff very lightly — a small pinch, or nothing at all.
Sew it to the top of the pumpkin, covering the knot and the gathered centre. Angle it slightly rather than setting it perfectly upright; a straight stem looks artificial.
No magic ring? Ch 2 and work 6 sc into the second chain from the hook.
Troubleshooting
My pumpkin is a ball, not a pumpkin. The segments weren’t pulled tight enough. Undo them and pull harder — this is the most common problem by a distance.
The ribs don’t show. You worked into both loops instead of the back loop only. The front loops should be visible as horizontal bars across the surface of the strip.
It’s lumpy. Stuffing unevenly distributed. Unpick the top gathering, redistribute, push stuffing toward the outer edges, and close it again.
It sags. Under-stuffed. Pumpkins need more stuffing than feels reasonable.
The seam shows. Turn it to the back. Or line the seam up with one of your segment lines, where it disappears completely.
The strip is curling as I work it. Normal for back loop ribbing. It flattens once seamed.
Variations
A set of three sizes. Make a small, a medium and a large and group them. Three pumpkins together look like decorating; one looks like a craft project.
Velvet yarn. Chenille or velvet yarn makes a pumpkin that looks like the expensive ones in homeware shops. It’s harder to work with — the stitches are difficult to see — so make a plain one first.
A leaf and a curl. Sew a small crochet leaf beside the stem, and add a curled tendril by chaining 15, then working 2 sc into each chain back down. It spirals on its own.
A real stem. A short twig from the garden, pushed into the top and secured with a few stitches, looks better than crochet on a large pumpkin.
Cream and sage. The muted colours photograph better and sit in a room all autumn without shouting.
What’s next
Pumpkins group best with other small autumn pieces — a bowl of acorns and leaves beside them, or a set of coasters in the same palette.
More seasonal ideas: Easy Crochet Projects for Fall →
Frequently asked questions
How do you crochet a pumpkin shape?
Work a ribbed rectangle, seam it into a tube, gather both ends, stuff it, then cinch yarn around the outside to create segments. The shape comes from the segmenting, not from crochet shaping.
What yarn is best for crochet pumpkins?
Worsted weight wool or a soft acrylic. A slightly fuzzy yarn looks cosier than cotton. Velvet yarn gives a more polished result but is harder to work with.
Why does my crochet pumpkin look like a ball?
The segmenting yarn wasn’t pulled tight enough. Pull firmly — much firmer than feels comfortable.
How do I make different sized crochet pumpkins?
The length of the starting chain sets the height; the number of rows sets the width around. Ch 16 with 24 rows for small, ch 26 with 38 rows for large.
How much stuffing does a crochet pumpkin need?
More than you’d expect. It should feel firm and hold its shape when squeezed. Under-stuffed pumpkins sag within days.
Can beginners crochet a pumpkin?
Yes. It’s a flat rectangle of single crochet with no shaping at all — the pumpkin appears during assembly.
How long does it take to crochet a pumpkin?
About an hour for a medium one, including the assembly and the stem.
How do you crochet a pumpkin?
Work a rectangle in back loop only to create vertical ribbing, seam the short ends into a tube, then run a gathering thread through the top and bottom edges and pull tight. Stuff before closing, then wrap yarn around the middle to create the segments.
How do I make the pumpkin segments?
Thread a long length of yarn onto a needle, pass it from the bottom of the pumpkin up through the centre to the top, then back down the outside. Pull snug and repeat six to eight times around. Those wraps are what make it read as a pumpkin.
What should I use for the pumpkin stem?
A small brown tube worked in the round and stuffed lightly, sewn to the top. For a more natural look, use a real cinnamon stick or a small twig pushed into the centre — it also adds scent.
What size hook for a crochet pumpkin?
A 5.0 mm hook with worsted weight yarn gives a good dense fabric. Pumpkins need to hold their shape under stuffing, so avoid going larger — a loose fabric will sag and lose the segments.
How do I make my crochet pumpkin firm?
Stuff it densely with fibrefill, adding it in small pinches and pressing outward. For a weighted pumpkin that sits properly on a shelf, put a small bag of rice or dried beans in the base before adding the stuffing.





2 Comments on “How to Crochet a Pumpkin for Beginners: Easy Step-by-Step Tutorial”