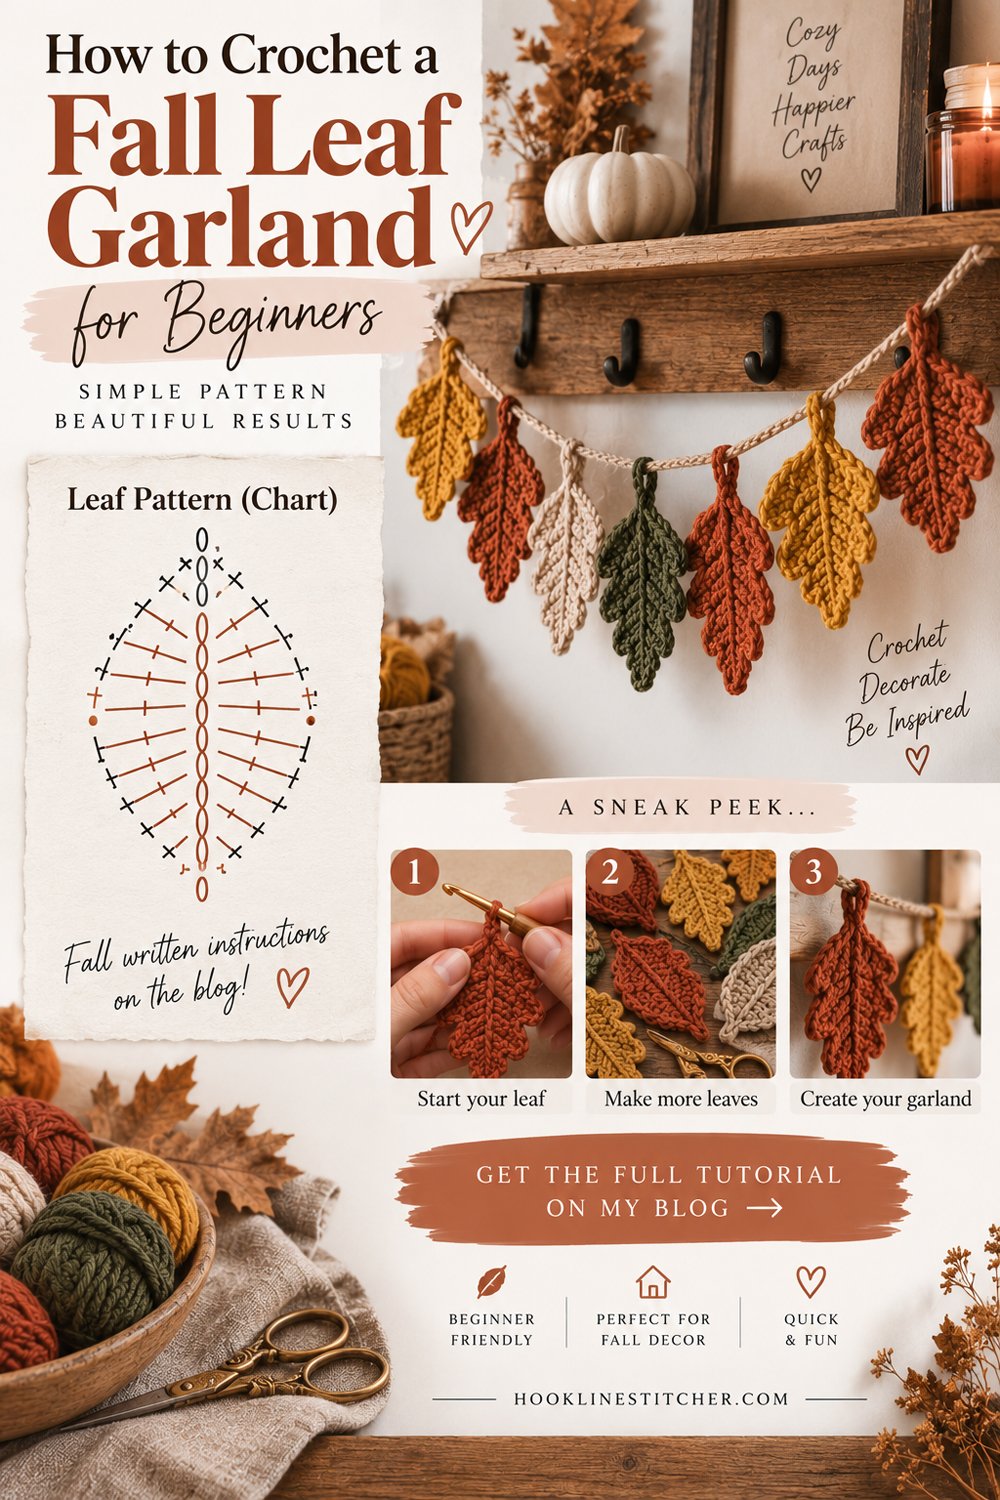
A crochet fall leaf garland is one of the most effective autumn decorations you can make, and the leaves are only half of it.
The other half — the part almost nobody explains — is the cord. A garland is a row of leaves hanging from a long chain, and a single crochet chain stretches under weight. Hang twelve leaves from one and within a week it sags in the middle and the spacing drifts.
The fix is simple and takes very little extra time: you slip stitch back along the chain, doubling it into a firm cord that holds its length. That’s the method below.
Everything else is choosing colours, spacing and length — which this guide covers too.

From the shop · New pattern
A sweet cat-ear coaster in just 5 rounds. Beginner friendly, printable 7-page PDF for $4.99.
See the pattern →What you need to know first
- Chain stitch
- Slip stitch
- How to crochet at least one leaf shape — a maple leaf, an oak leaf or a simple leaf all work
What you need
Leaves. Around 12 for a garland about 1.5 metres long. Mixing shapes looks best — a few maple leaves, a few oak leaves, and some simple leaves.
Worsted weight (4) yarn for the cord, in brown, cream or a neutral that won’t compete with the leaves. About 15 metres for a 1.5 metre garland.
A 4.0mm hook.
A tapestry needle and scissors.
From the shop · New pattern
A sweet cat-ear coaster in just 5 rounds. Beginner friendly, printable 7-page PDF for $4.99.
See the pattern →Cathrinee’s Supply Kit
Everything you need for this project
Planning your crochet fall leaf garland
Five minutes of planning here makes the finished garland look far more considered.
How many leaves do you need?
A good spacing is one leaf every 10–12 cm. Measure where the garland will hang and divide:
- 1 metre — about 8 leaves
- 1.5 metres — about 12 leaves
- 2 metres — about 16 leaves
Add two extra so you can leave out any that came out less even than the others.
Choosing colours
The most natural-looking autumn garlands use four or five colours: rust, burnt orange, mustard, deep red and olive, with one pale shade like cream or oatmeal.
That pale shade matters. A garland entirely in warm tones reads as heavy. One or two light leaves among them makes the whole thing brighter.
Lay your leaves out in the order you’ll attach them before you start. Avoid putting two of the same colour or shape side by side.
Mixing shapes
Maple leaves are the most eye-catching, so space them out rather than clustering them. Oak and simple leaves fill in between. A rough pattern of maple, oak, simple, oak, maple works well.
Step 1: Make your leaves
Make all your leaves first, following the maple, oak or simple leaf pattern.
Block them before assembling. Dampen each leaf, pin it flat, and let it dry. Unblocked leaves curl, and curled leaves on a garland look messy from across a room. This is the step that makes the biggest difference to the finished result.
Leave each leaf’s stem attached — you’ll join the cord through it.
Step 2: Make the first hanging loop
With your cord yarn:
Ch 15, then sl st into the first chain to form a loop.
This loop is how you’ll hang one end of the garland.
Step 3: Crochet the cord and attach the leaves
Now you’ll chain along, joining leaves as you go.
Ch 20.
Take your first leaf. Insert your hook through the tip of its stem, yarn over and pull through, and sl st to secure it to the cord.
Ch 20 again, and attach the next leaf the same way.
Continue until every leaf is attached, keeping the spacing consistent at 20 chains between each — counting your chains is what keeps a garland even.
Tip: lay the garland flat as you work and check that the leaves are all hanging the same way. It’s easy to attach one upside down.
Step 4: Make the second hanging loop
After the last leaf:
Ch 20, then ch 15 more and sl st back into the 15th chain from the hook to form a matching hanging loop.
Step 5: Reinforce the cord
This is the step that stops sagging.
Without fastening off, turn and sl st into every chain back along the whole cord, all the way to the first hanging loop. When you reach a leaf, sl st through the stem again, which secures it twice.
It takes about fifteen minutes for a 1.5 metre garland. The result is a firm, doubled cord that holds its length and keeps your spacing even.
Fasten off and weave in the ends securely at both hanging loops — two passes in opposite directions, since the loops carry all the weight.
Faster alternative: a twine garland
If you’d rather skip the crochet cord, use jute twine instead.
Cut a length of twine about 30 cm longer than your garland, tie a loop at each end, and tie or sew each leaf’s stem to the twine at 10–12 cm intervals. Jute doesn’t stretch, and it gives the garland a rustic look.
Adding extras
A leaf garland is lovely on its own, and it’s easy to add variety:
- Crochet acorns tied between leaves
- Mini pumpkins at each end
- Wooden beads threaded onto the cord between leaves
- Crochet mushrooms for a woodland look
- Pinecones for a garland that carries through to Christmas
Where to hang it
A mantelpiece, a staircase banister, a bookshelf edge, across a window, above a doorway, or along the front of a table. Garlands are also lovely draped loosely across a table as a runner rather than hung. For more ideas, see easy crochet projects for fall.
Troubleshooting your crochet fall leaf garland
The garland sags in the middle. The cord wasn’t reinforced. Slip stitch back along the whole chain.
The spacing is uneven. Count the chains between each leaf. Twenty every time.
The leaves curl and look messy. They weren’t blocked. Dampen and pin them flat before assembling.
The leaves twist and face backwards. Attach each one through the same side of the stem, and check the garland flat as you go.
The hanging loops stretch. Weave the ends in twice, and reinforce the loops with a second round of slip stitches.
The colours look muddy. Add one or two cream or pale leaves among the warm shades.
Storing your garland
Roll it loosely around a piece of card rather than folding it, and store it in a box or cloth bag. Folding crushes the leaves; rolling keeps them flat. Cotton leaves last for years this way.
Frequently asked questions
How do you make a crochet fall leaf garland?
Crochet and block your leaves, then make a long chain cord with a hanging loop at each end, attaching a leaf every 20 chains. Slip stitch back along the whole cord to reinforce it.
How many leaves do I need for a crochet garland?
About one leaf every 10–12 cm. A 1.5 metre garland needs around 12 leaves.
How do I stop my crochet garland from sagging?
Slip stitch back along the entire chain cord after attaching the leaves. The doubled cord holds its length; a single chain stretches.
What colours work best for a fall leaf garland?
Rust, burnt orange, mustard, deep red and olive, with one pale shade such as cream to keep it from looking heavy.
Do I need to block crochet leaves for a garland?
Yes. Blocked leaves lie flat and look far neater from a distance. Unblocked leaves curl.
Can I use twine instead of a crochet cord?
Yes. Jute twine doesn’t stretch and gives a rustic look. Tie the leaves to it at even intervals.
How long does it take to make a crochet leaf garland?
About an evening for the cord and assembly once the leaves are made. Each leaf takes around twenty minutes.




